View Patient Encounter
A Patient Encounter includes an Encounter Form, which consists of one or more Encounter pages, each of which contains one or more Encounter Elements.
Encounter Elements and Encounter Forms are defined in the Encounter Manager module. For more information, click here.
- Step-by-step
- View All Encounters
- View Last Encounter
- Main toolbar
- Secondary toolbar
- General Patient information
- Patient Alerts
- Encounter Page Elements
- Task Manager bar
- Related topics
Step-by-step
- To view a Patient Encounter, you must first find a Patient Record. For help, click here.
- For the desired Patient Record, click the View button
 or anywhere on the Patient Record row, except the Edit button.
- The View Patient Record window displays in the Contents Pane, with Patient Last Name highlighted.
- The Open Windows list updates to display View Patient Record.
- The Patient Navigation list displays the selected patient's name and a navigation tree for accessing the patient's Record, Encounters, Optical, Medications and Cataract Surgery Sheet.
Note: For those patients who have not had cataract surgery, a message to this effect displays when Cataracts Surgery Sheet is clicked. - The Status Bar updates to include the Task Manager.
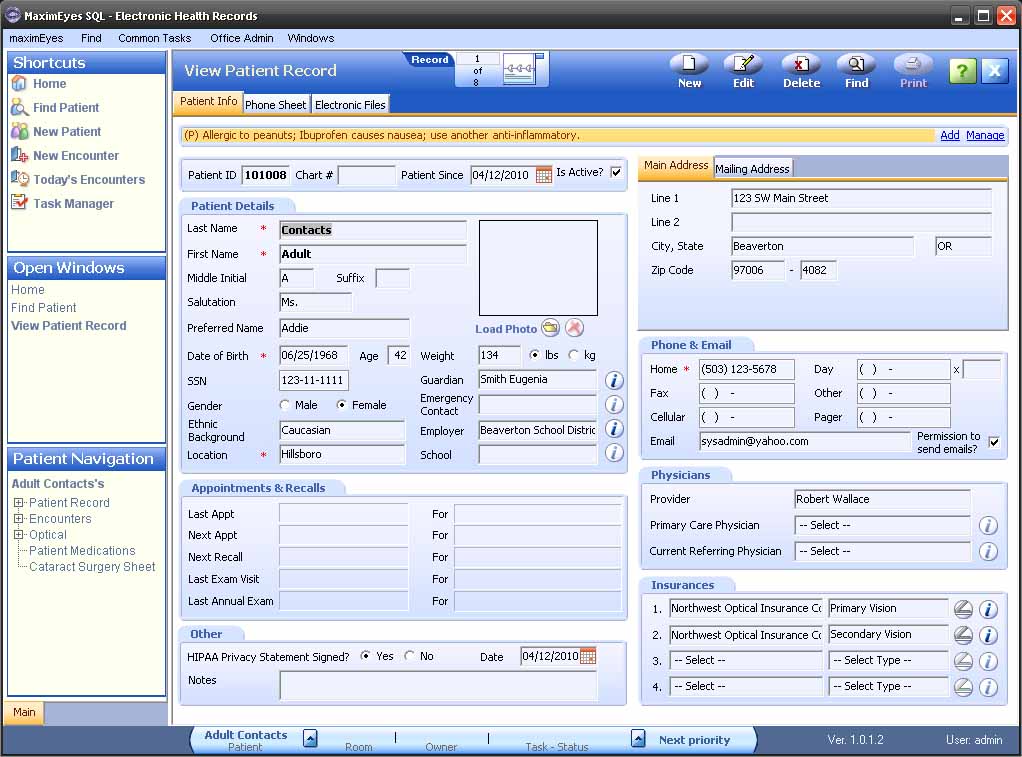
- In the Patient Navigation list, click the Expand icon
 next to Encounters to expand the navigation tree.
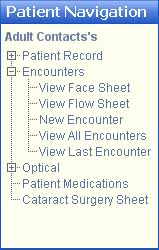
- Click View All Encounters or View Last Encounter.
View All Encounters
- Click to display the Encounters window. For complete information on this window, including how to use the Filter By tab, click here.
- The Encounters window displays in the Contents Pane.
- The Patient Details icon
 is active.
- The Filter By tab displays below the patient name.
- The Patient Encounters tab displays below the Filter By tab, listing the Patient Encounters in ascending chronological order.
- The Open Windows list displays Encounters.
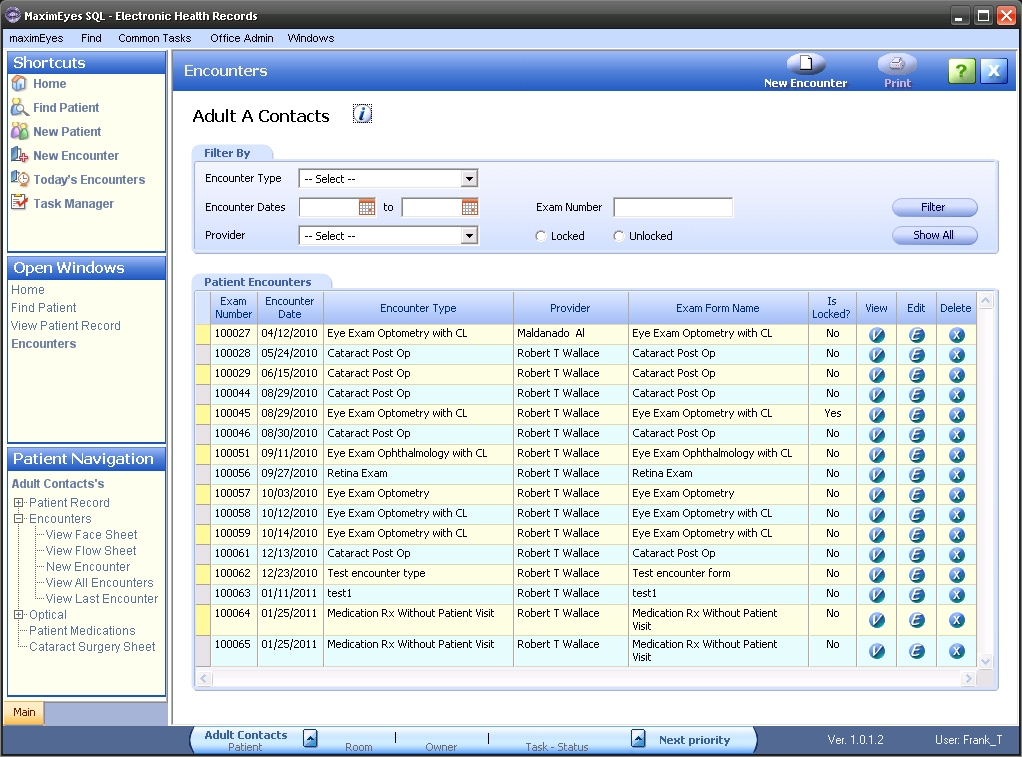
- For the Encounter you wish to view, click the View button
 or anywhere on the Encounter record row, except the Edit
  or Delete
  buttons.
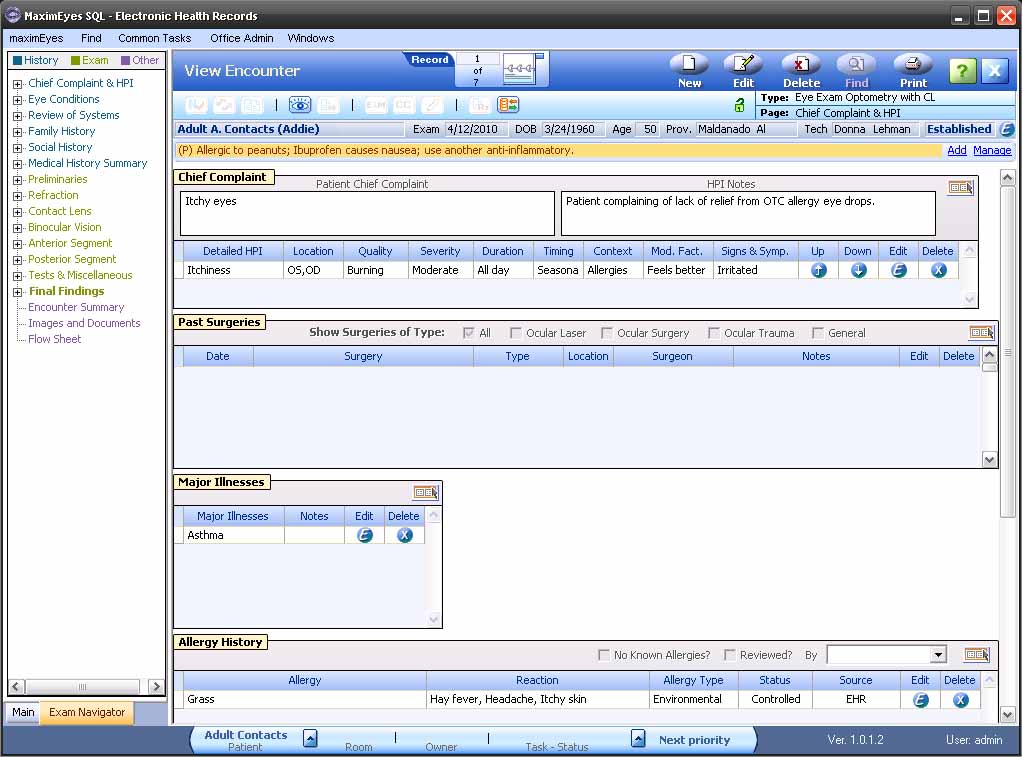
- The Exam Navigator displays in the Left Pane.
- The View Encounter window displays in the Contents Pane.
- View-only items display as grayed-out.
- The Rolodex indicates which Encounter is displayed of the total number of Patient Encounters. For example, in the screen shot below, the first Patient Encounter of a total of seven Patient Encounters displays ("Record 1 of 7").
View Last Encounter
Click to display the most recent Encounter for this patient.
- The Exam Navigator displays in the Left Pane.
- The View Encounter window displays in the Contents Pane.
- View-only items display as grayed-out.
- In the Rolodex, the Record Number is the same as the total number of records.
For example, in the screen shot below, the Patient record contains a total of seven Patient Encounters, and the seventh Encounter displays ("Record 7 of 7").
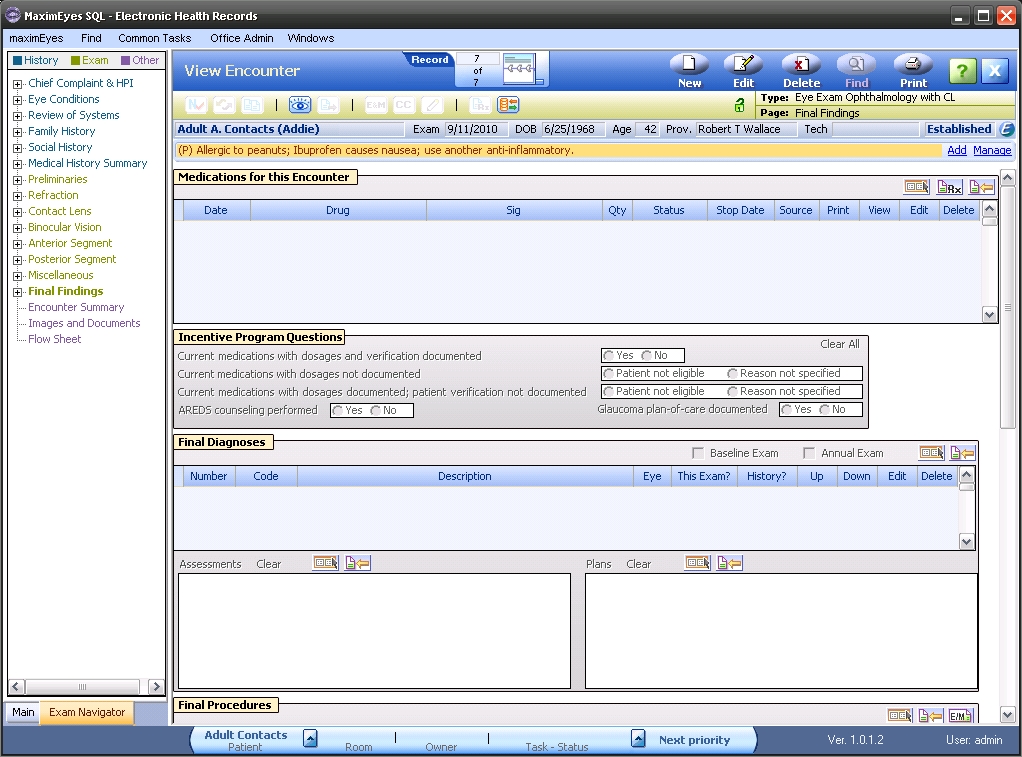
Main toolbar
Use the Rolodex to view another Encounter for this patient.

- Click the upper Rolodex card to view the Patient Encounter immediately preceding the current Patient Encounter.
- Click the lower Rolodex card to view the Patient Encounter immediately following the current Patient Encounter.
- Click and move the slider up and down to find another Patient Encounter.
- Highlight the Rolodex card number and enter the number of the Patient Encounter you wish to view.
Click the corresponding button to perform these common tasks:
 Create a new Patient Encounter
 Edit the current Patient Encounter
 Delete the current Patient Encounter
 Print the current Patient Encounter
 Open the Help window
 Close the View Encounter window
Print Encounter
Click the Print button to display the Print Documents popup.
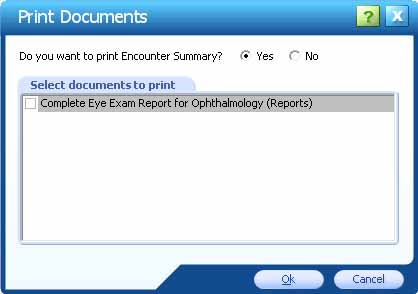
- Select whether to print the Encounter Summary.
Note: This Summary displays data for only those Elements that have data entered in them (it does not display Elements which do not have data). - Select the Documents to print.
- Click OK to print the Documents.
- Click Close to close the popup without printing Documents.
Secondary toolbar
In the Secondary toolbar, these icons are active:
Type and Page
These fields display to the right of the Lock Encounter icon. ![]()

|
The Type name of the selected Patient Encounter. For information on Encounter Types, click here. |

|
The name of the displayed Encounter page.
|
General Patient information
- To display general information about the patient, hover the cursor over any of the first seven fields of the General Information bar.
- These fields are view-only.
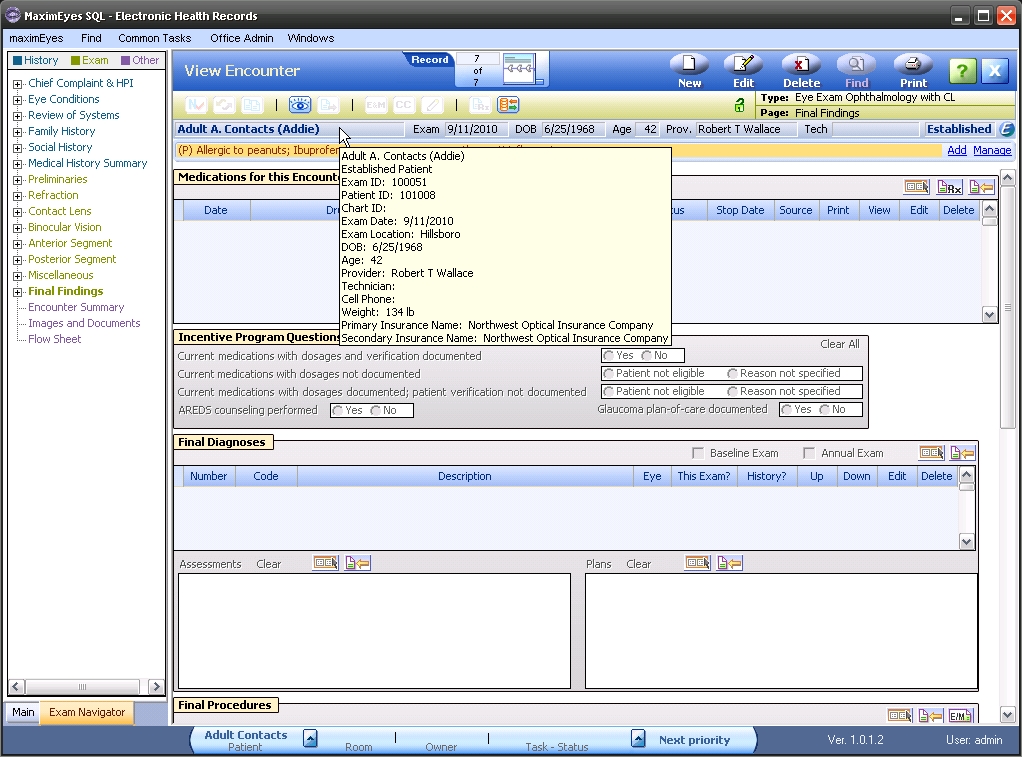
Field descriptions, left to right:
- First field: Patient name.
- Exam: Date of last patient exam. This field is blank if this is a new patient.
- DOB: Patient date of birth.
- Age: Patient age as of today.
- Prov: Name of patient's provider.
- Tech: Name of Technician.
- Established: Patient status.
- Edit button:
 Click to display the Edit Patient Info popup. The Exam Location field is active.
Patient Alerts
MaximEyes® SQL allows the user to add important health information, such as allergies, for each patient in the form of an Alert. Alerts display in the Alert Bar (located below the Main toolbar), unless they are marked Private.

- To add a Patient Alert, click the Add link. For more information, click here.
- To manage the patient's Alerts, click the Manage link. For more information, click here.
Encounter Page Elements
The Encounter Elements of the currently-selected Encounter page display in the Contents Pane. These fields are view-only.
- To view page Elements that do not display in the Contents Pane, do one of the following:
- Use the scroll bar on the right to move up and down the page.
- In the Exam Navigator, click the Expand icon
 next to the desired page to expand its navigation tree, and then click the desired Element.
- To view another Encounter page and its Elements, click the desired page name in the Exam Navigator.
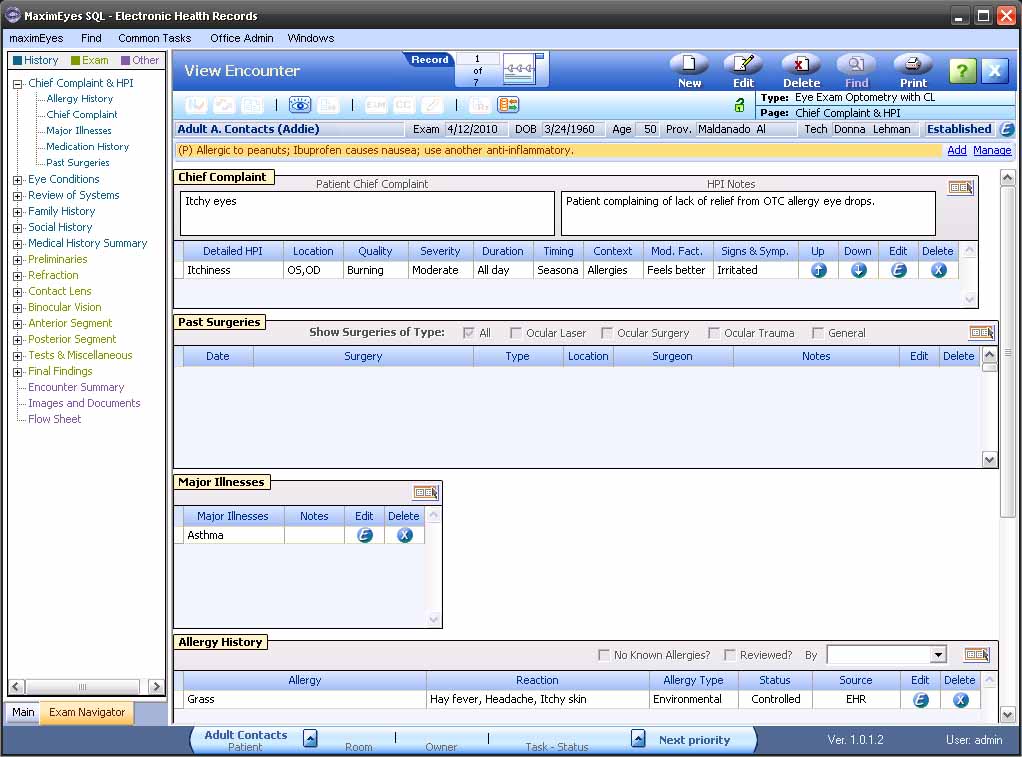
Task Manager bar
The Task Manager bar displays in the Status bar, at the bottom of the View Encounter window.

The Task Manager provides real-time information about where the patient is (Room), who the patient is with (Owner) and what procedure the patient is undergoing (Task - Status).
- Tasks can be updated by clicking the arrow
 next to the Patient name.
- To view the next assigned Task, click the arrow
 next to Next priority.
For more information, click here.
 Top of Page