Code Complete
The Code Complete tool allows the user to define rules based on the findings and test(s) completed as part of a Patient Encounter, in order to generate Diagnoses and/or Procedure Codes. The user can then review these Codes on the Code Complete Worksheet.
- The user invokes Code Complete by clicking the Code Complete button
 on the Secondary toolbar of the Edit Encounter or Create Encounter window.
- MaximEyes® SQL then collects all the data entered on all the Encounter Elements by the user up to that point, and applies the rules defined in the Code Complete Manager.
Note: Code Complete can be used at any time during the Create New Encounter or Edit Encounter process.
- Code Complete Worksheet sections
- Step-by-Step
- Select a Suggested Diagnoses Code
- Select a Suggested Procedure Code
- Save the Encounter
- Related topics
Code Complete Worksheet Sections
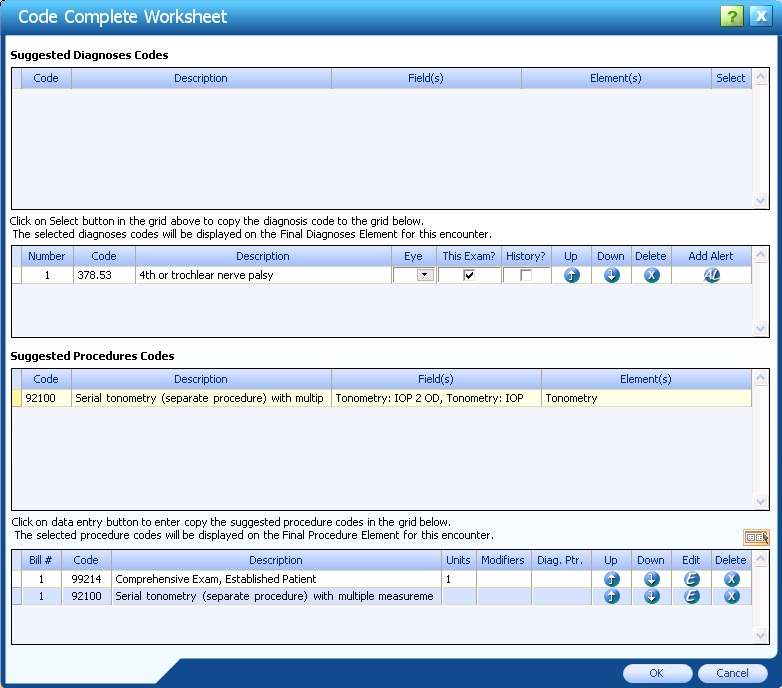
The Code Complete Worksheet is divided into four grids:
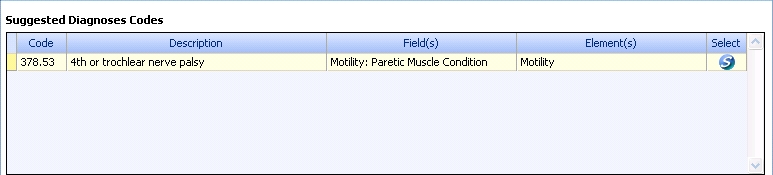
- Suggested Diagnoses Codes: Displays the unique Diagnoses Codes suggested by MaximEyes SQL, based on the data entered by the user on the Patient Encounter Form and the Code Complete Rules set up in the Code Complete Manager module.
- Selected Diagnoses Codes: When the user clicks the Select button
 for the desired Code in the Suggested Diagnoses Code grid, the Code is added to this grid. This Code also displays in the Final Diagnoses Element on the Final Findings page of the Patient Encounter Form.

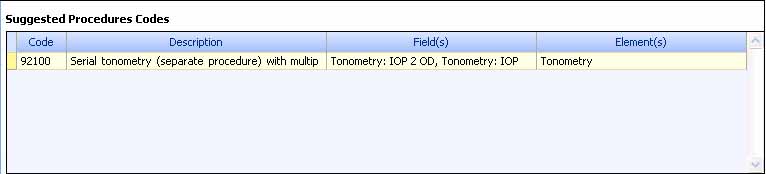
- Suggested Procedures Codes: Displays the unique CPT codes suggested by MaximEyes SQL, based on the data entered by the user on the Patient Encounter window and the Code Complete rules defined in the Code Complete Manager module.
- Selected Procedures Codes: Selected by clicking the Data Entry button
 , which opens the Final Procedures - Data Entry screen. From here, the user can add the Code Complete-suggested Procedure Codes to the Final Procedures Element.

Step-by-Step
- Click the Code Complete button on the Secondary toolbar of the Create New Encounter or Edit Encounter window. The Code Complete Worksheet displays.
In the example below, enough data has been entered into the Patient Encounter Form to generate Suggested Diagnoses Codes and Suggested Procedures Codes.
If enough data has not been entered, the Code Complete Worksheet displays as blank.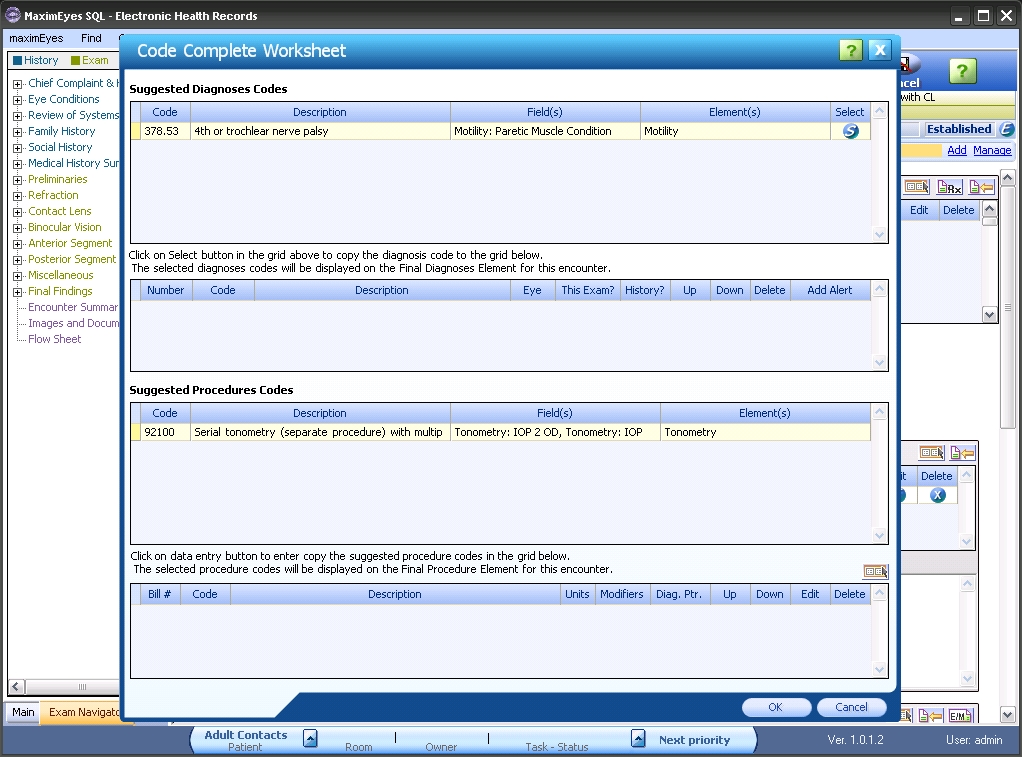
- Select to do one of the following:
- Select the Suggested Diagnoses and Procedure Codes to add to the Final Diagnoses and Final Procedure Elements, respectively, of the Patient Encounter Form.
OR - Simply review the Worksheet to determine, based on the findings and test(s) so far, how the exam is shaping up and in what direction to continue it.
For example, if the findings are more medical-related vs. refractive, the user may decide to move towards the medical type exam for the current Patient Encounter. The user may then decide to postpone other sub-evaluations until a different day, given that insurances typically pay for only one type of visit per Date of Service.
- Select the Suggested Diagnoses and Procedure Codes to add to the Final Diagnoses and Final Procedure Elements, respectively, of the Patient Encounter Form.
Select a Suggested Diagnoses Code
- For the desired Code, click the Select button in the Code row.
- The Select button no longer displays.
- The Diagnoses Code copies to the second grid.
- The selected Diagnoses Code displays in the Final Diagnoses Element for the Patient Encounter Form.
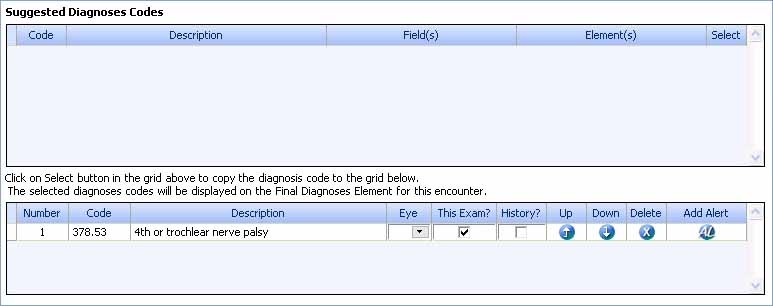
- For the selected Diagnoses Code:
- Use the drop-down list to specify to which eye(s) the Diagnoses pertain.
- Optionally select to add the Diagnoses to the History Element.
- If more than one Diagnoses Code is selected, use the Up
 and Down
  arrows to change the order of the Diagnoses.
- Click Delete
 to delete a Diagnoses Code. The deleted Code moves to the upper grid, where it may be selected again.
- Click Add Alert
 to open the Add Patient Alert popup and add a Patient Alert to the Patient Record.
- Select a Suggested Procedure Code(s).
Select a Suggested Procedure Code
- For the desired Code, click the Data Entry screen button. The Final Procedures - Data Entry screen displays.
- In the Procedures (From History, Code Complete, and Equipment) grid, use the Filter By options to display the desired Procedure Codes.
- Procedures display in ascending chronological order by Type.
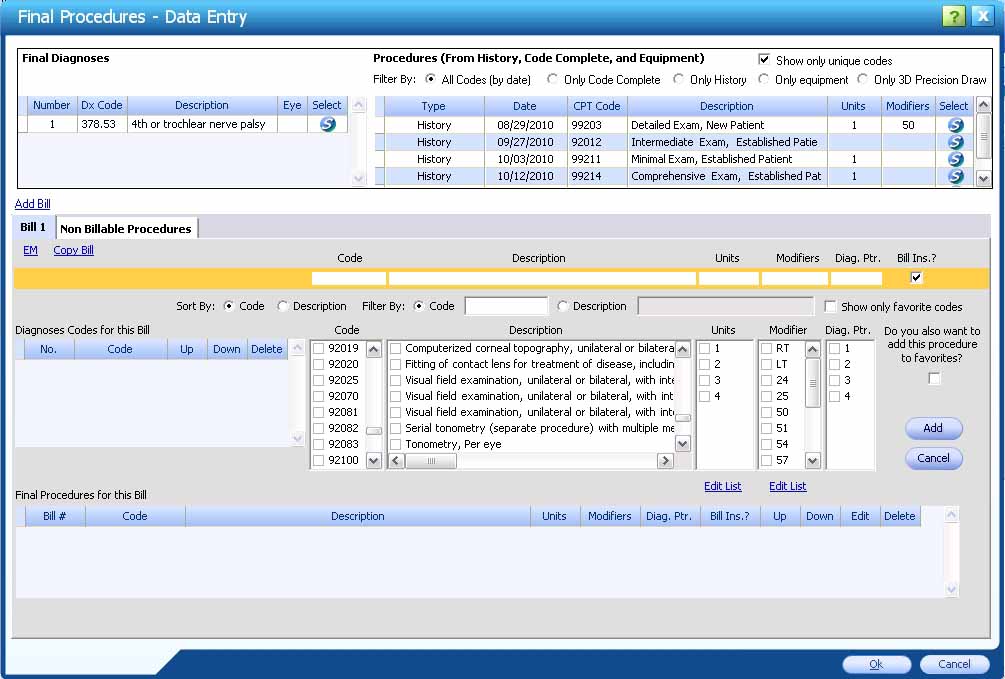
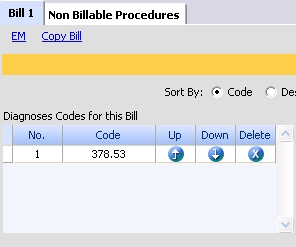
- To select a Final Diagnoses, click the Select button in the desired row. The data copies to the Diagnoses Codes for this Bill grid of the Bill 1 tab.
- If more than one Diagnoses are selected, use the Up and Down arrows to change the order of the Diagnoses.
- Click Delete to remove a Diagnoses Code from the Bill 1 tab.
- If more than one Diagnoses are selected, use the Up
- To select a Procedure, click the Select button in the desired row of the Procedures (From History, Code Complete, and Equipment) grid. The data copies to the Code grid of the Bill 1 tab, with the appropriate fields completed.
- Only one Procedure Code can be selected at a time.
- Optionally select to add this Procedure to Favorites.
- Click the Cancel button to remove a Procedure Code from the Bill 1 tab.
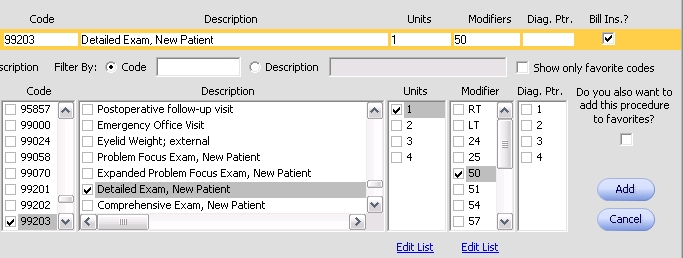
- Click the Add button to add the selected Procedure Code to the Final Procedures for this Bill grid.
- If more than one Procedure Code is added, use the Up and Down arrows to change the order of the Procedures.

- If more than one Procedure Code is added, use the Up
- To edit a Final Procedure, click the Edit button.

- The Add button changes to the Update button.
- As desired changes are made to the Code, Description, Units, Modifier and Diagnoses Pointer fields, the fields highlight.
- If desired, select another Procedure Code and add it to the Final Procedures for this Bill grid.
- To launch the E&M Code Checker, click the EM link on the Bill 1 tab. For help using the E&M Code Checker, click here.
- To make an exact copy of the Bill on-the-fly, click the Copy Bill link on the Bill 1 tab.
- The Final Procedures - Data Entry screen updates to include the new Bill 2 tab.
- Click the new tab and make changes as desired.
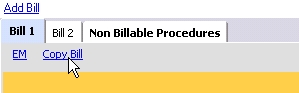
Note: Multiple Duplicate Bills can be created. The new Bill is a copy of the active Bill when the Copy Bill link is clicked.
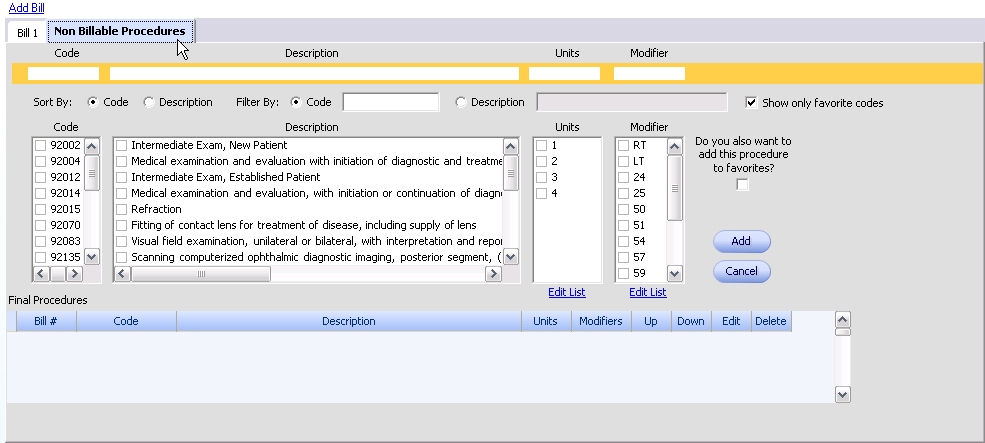
- If desired, click the Non Billable Procedures tab to add non-billable Procedures to the Patient Encounter Form.
- Make the desired selections.
- Click the Add button to add the selected Procedures to the Final Procedures grid.
- As with billable Procedures, Non Billable Procedures may be moved Up and Down, Edited and Deleted by clicking the corresponding buttons.
Note: These Procedures do NOT display on the Bill for this Patient Encounter.
However, they DO display in the Final Procedures Element of the Patient Encounter Form.
- After all desired changes have been made, click OK to save changes to the Final Procedures - Data Entry screen. The Data Entry screen closes and the Code Complete Worksheet displays.
Note: The Code Complete Worksheet must be saved to add the selected Diagnoses Code(s) to the Final Diagnoses Element and the selected Procedure Code(s) to the Final Procedures Element of the Patient Encounter Form.
- Click the OK button to close the Code Complete Worksheet and save changes.
- The selected Diagnoses Code(s) are added to the Final Diagnoses Element of the Patient Encounter Form.
- The selected Procedure Code(s) are added to the Final Procedures Element of the Patient Encounter Form.
- Click the Cancel button to close the Code Complete Worksheet without saving changes.
Save the Encounter
To save all changes made to the Code Complete Worksheet, you MUST save the Patient Encounter by clicking the Save button in the Main toolbar of the Encounter window.
 Top of Page
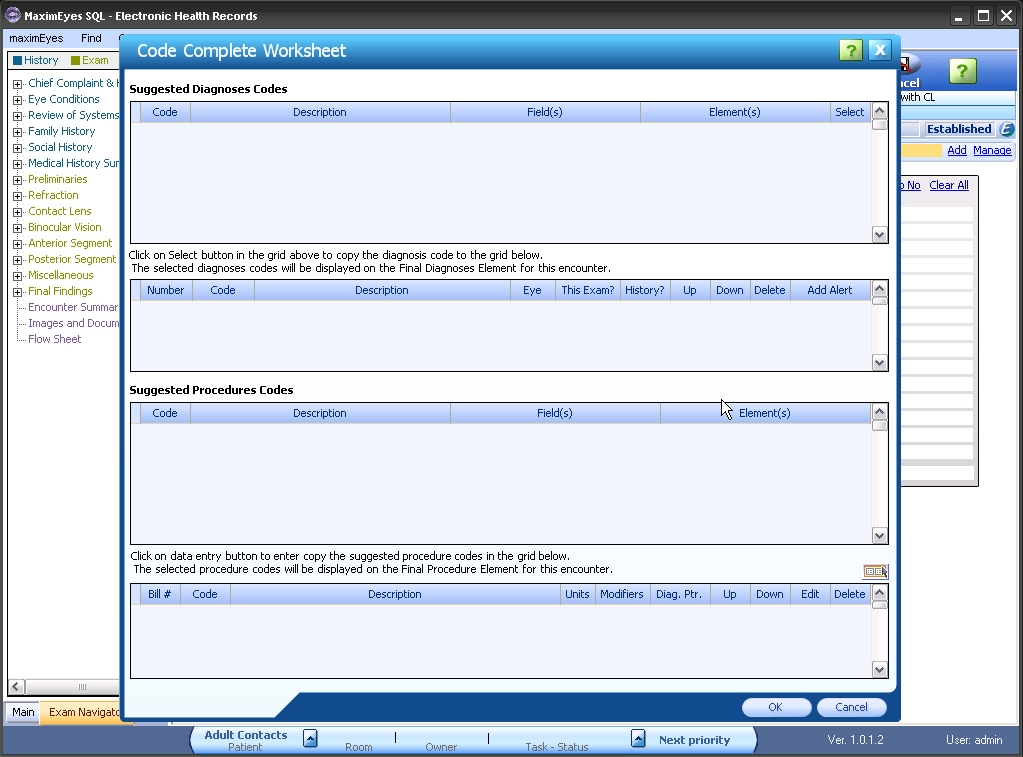