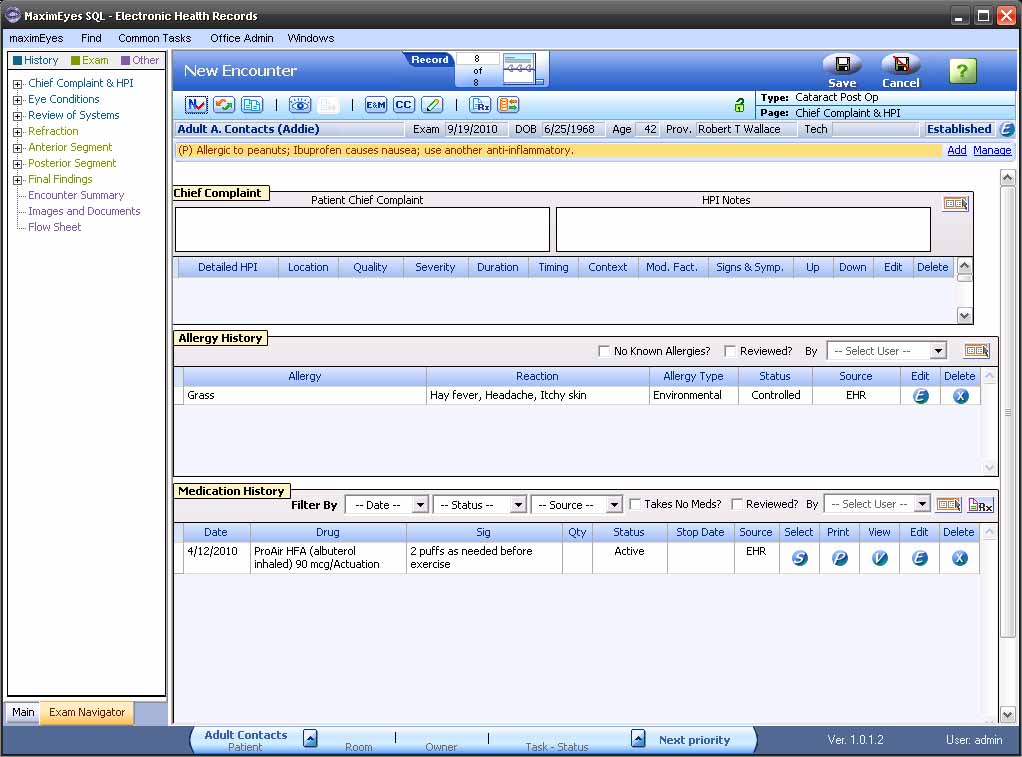
New Patient Encounter Description
A Patient Encounter includes an Encounter Form, which consists of one or more Encounter pages, each of which contains one or more Encounter Elements.
Encounter Elements and Encounter Forms are defined in the Encounter Manager module. For more information, click here.
Click to learn more about the New Encounter window:
- Left Pane tabs
- Exam Navigator
- Expand/Collapse Encounter page type navigation trees
- Navigate to Encounter pages
- Main toolbar
- Secondary toolbar
- General patient information
- Patient Alerts
- Task Manager bar
- Related topics
Left Pane tabs
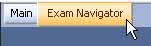
Use the tabs at the bottom of the Left Pane to toggle between the Main navigation (Shortcuts, Open Windows and Patient Navigation) and the Exam Navigator for the selected patient.
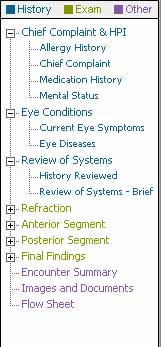
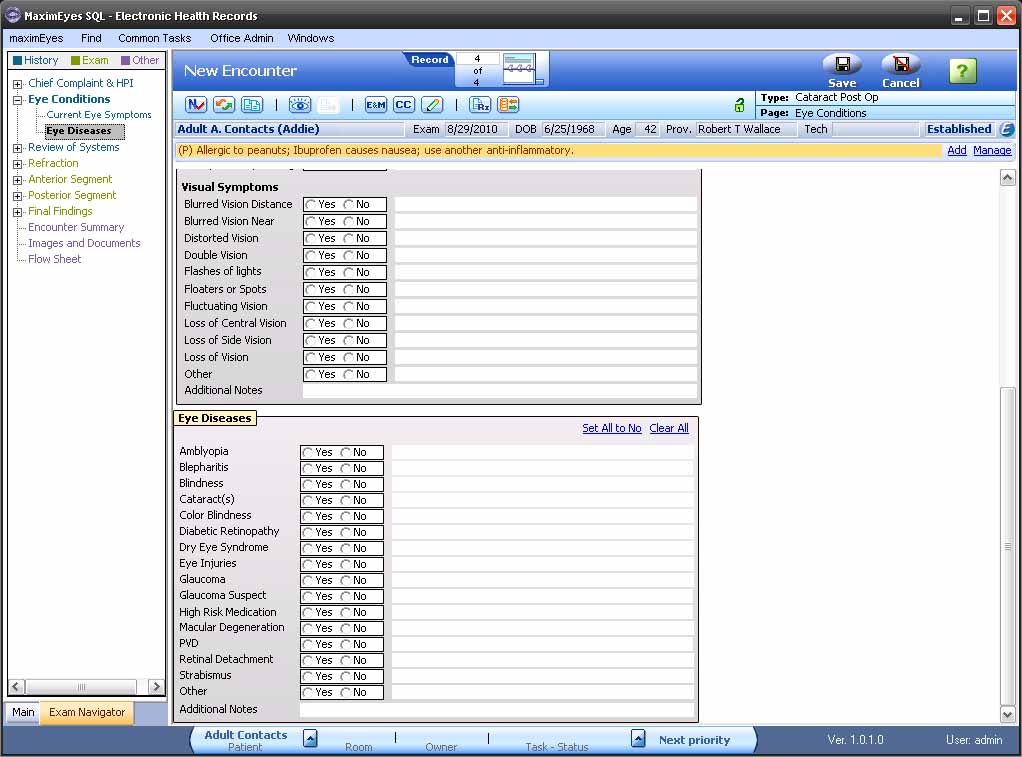
Exam Navigator
The Exam Navigator lists in alphabetical order all the Encounter Elements by Encounter page. There are three Types of Encounter pages listed in the Exam Navigator, designated by different colors:
- History pages are dark blue.
- Exam pages are olive green.
- Other pages are purple.
Expand/Collapse Encounter page type navigation trees

Click the desired page type name at the top of the Exam Navigator to quickly expand or collapse the navigation tree for all the Encounter pages and their Elements of that Type.
|
For example, to quickly expand the navigation trees for all the History Encounter pages that are part of the new Patient Encounter, click History at the top of the Exam Navigator.
To quickly collapse the navigation trees for all the History Encounter pages, click History at the top of the Exam Navigator. Expand and collapse individual navigation trees by clicking the Expand |
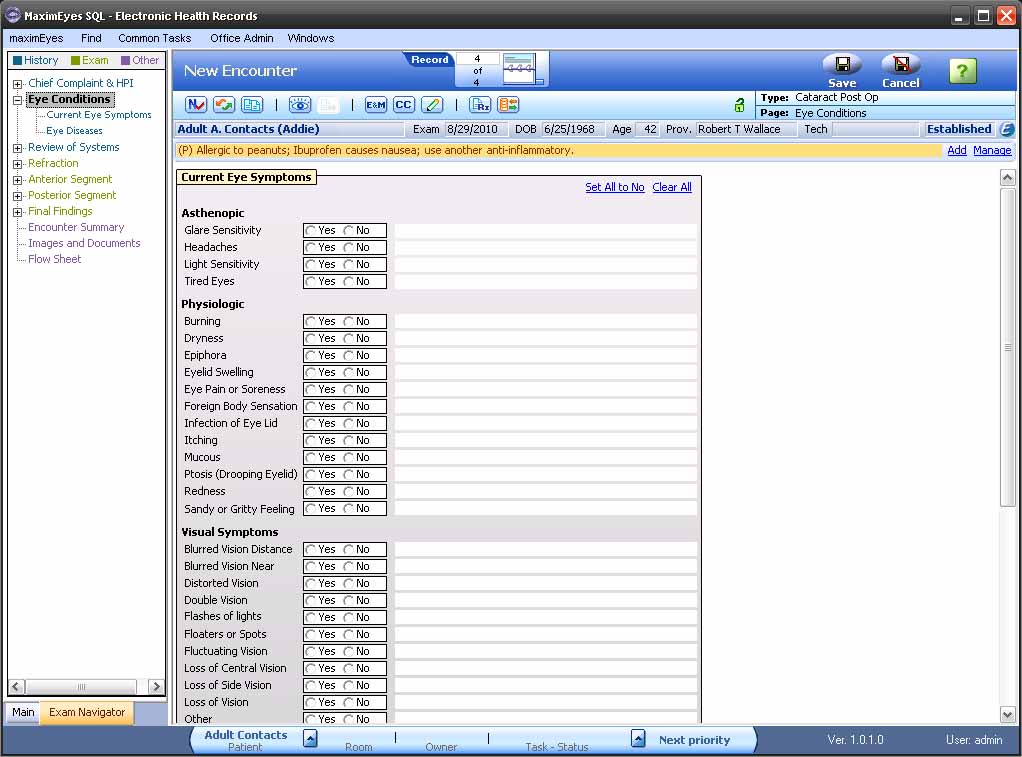
Navigate to Encounter pages
To navigate to another Patient Encounter page, click the corresponding page name in the Exam Navigator.
- The selected Encounter page displays in the Contents Pane.
- In the Exam Navigator, the selected page name is highlighted in gray.
- To expand a page in the Exam Navigator to see what Element(s) that page contains, click the Plus icon.

- To collapse an expanded page in the Exam Navigator, click the Minus icon.

Note: When an Encounter page is selected, all of its Elements may not display in the Contents Pane, depending on the number and type of Elements the page contains. To view an Encounter page Element that is not visible in the Contents Pane, do one of the following:
- Click the desired Element name in the expanded Encounter page list.
- Use the scroll bar on the right of the Contents Pane to scroll up and down.
Main toolbar

The Main toolbar contains the following:
| Name | Icon/Button | Description/Action |
|---|---|---|
| Record Browser Rolodex |
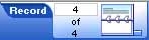
|
Use the Rolodex to quickly scroll to previous Encounters.
|
| Save |

|
Click to save the Encounter. |
| Cancel |

|
Click to close the Encounter without saving. If changes have been made, a warning displays; click OK to close the New Encounter window without saving or click Cancel to return to the New Encounter window. |
| Help |

|
Click to display Help for this window. |
Secondary toolbar

Click the following icons to perform these actions:
| Name | Icon | Action |
|---|---|---|
| Apply Form Normal Values |  |
Populate the entire Encounter Form with Normal values that have been defined for the Encounter Form under Setup Encounter Types. |
| Switch Encounter Type |  |
Change the Encounter type. Data in common Elements are copied to the new Encounter Form. |
| Copy Previous Encounter Data |  |
Select a previous Encounter for the patient and copy the History data only into the Encounter being created. |
| View Image History |  |
Link to imaging software, such as EyeRoute®, VISUPAC®, Medmont Studio®, etc.
Note: The selected imaging software must be installed on the workstation. Clicking this icon opens a popup window that displays a list of imaging software with which MaximEyes® SQL integrates. After selecting a software from the drop-down list, a list of images from that software for the current patient displays. Click the image name to display the image. |
| Send Outbound Documents |  |
Send Documents selected in the Final Outbound Documents Element for this Encounter type. The Documents displayed may be first previewed; the sending process starts by clicking the Confirm button. |
| Invoke E&M Code Checker |  |
Invoke the E&M Code Checker to validate an existing E/M Code entered in the Final Procedures Element. If no E/M Code is entered in the Final Procedures Element, one may be suggested, depending on the data entered into the Encounter Form. |
| Code Complete |  |
Display the Code Complete Worksheet. Enter the suggested Diagnoses and Procedure codes on the Final Diagnoses and Final Procedures Elements on the patient's Encounter.
The Code Complete Worksheet has four grids:
|
| Invoke 3D Precision Draw |  |
Invoke the 3D Draw Tool. Some data from this tool can be returned to various fields within the Patient Encounter. |
| Launch E-Prescribe |  |
Launch the E-Prescribe Browser, then navigate to the Rcopia® site.
Note: To use E-Prescribe, you must first set up the Rcopia login information (select Office Admin menu  Integrated Services E-Prescribe). A check is done to verify whether the Medication History Element and the Medications for this Encounter Element are present. Integrated Services E-Prescribe). A check is done to verify whether the Medication History Element and the Medications for this Encounter Element are present.
|
| Transfer Data to Practice Management System |  |
Transfer the following data from MaximEyes® SQL to MaximEyes® Practice Management System (PMS):
|
| Lock Encounter |  |
Lock the new Patient Encounter, prohibiting further changes. |
| Type |  |
Encounter type with which the Encounter Form is associated. For more information, click here. |
| Page |  |
Name of the Encounter Form page currently selected from the Exam Navigator list. |
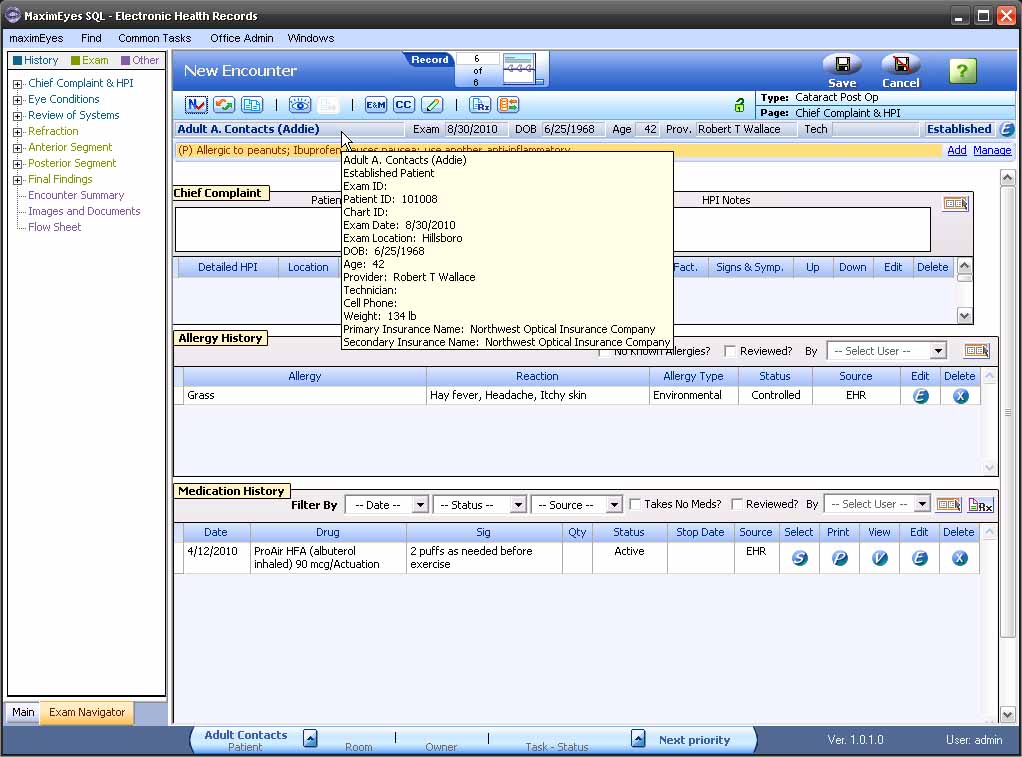
General patient information

Hover the cursor over any of the first seven fields to display general information about the selected patient.
Field descriptions, left to right:
- First field: Patient name.
- Exam: Date of last patient exam. This field is blank if this is a new patient.
- DOB: Patient date of birth.
- Age: Patient age as of today.
- Prov: Name of patient's provider.
- Tech: Name of Technician.
- Established: Patient status.
- Edit button:
 Click to display the Edit Patient Info popup. The Exam Location field is active.
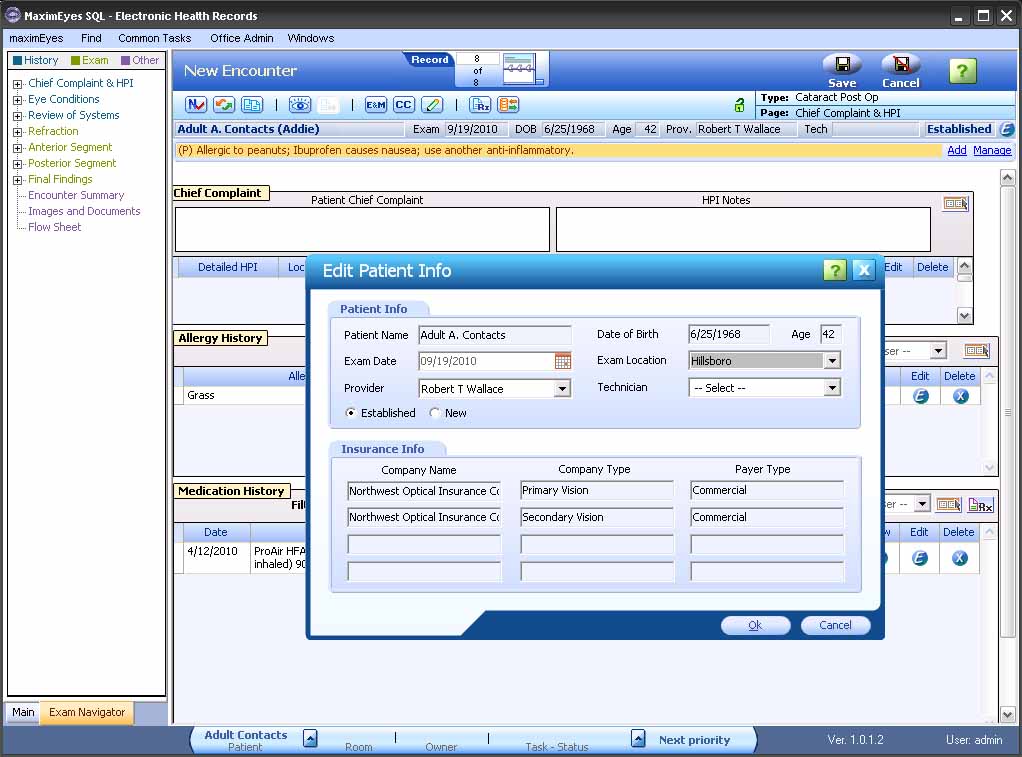
Using the mouse or Tab key, move through the fields and make changes as desired.
- Click the OK button to close the popup and save changes.
- Click the Cancel button to close the popup without saving changes.
Patient Alerts

Add Patient Alert
Click the Add link to add a Patient Alert. The Add Patient Alert for [Patient Name] popup displays.
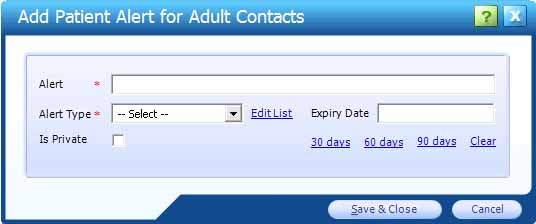
- Using the mouse or Tab key, move through the fields and make changes as desired. For more information, click here.
- Click the OK button to close the popup and save changes.
- Click the Cancel button to close the popup without saving changes.
Manage Patient Alert
Click the Manage link to edit the Patient Alert(s). The Patient Alerts for [Patient Name] popup displays.
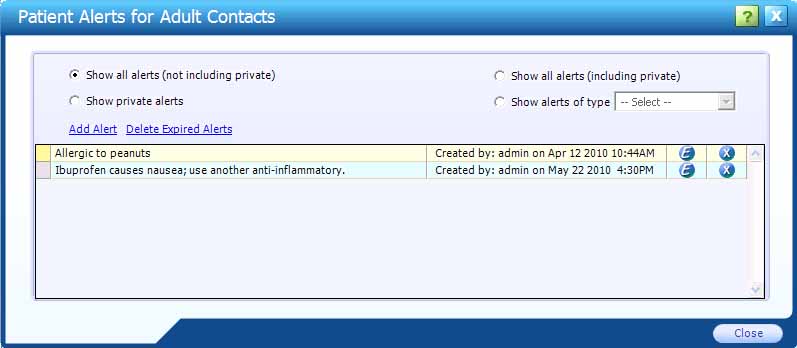
- Using the mouse or Tab key, move through the fields and make changes as desired. For more information, click here.
- Click the Close button to close the popup.
Task Manager bar
The Task Manager bar displays in the Status Bar, at the bottom of the New Encounter window.

The Task Manager provides real-time information about where the patient is (Room), who the patient is with (Owner) and what procedure the patient is undergoing (Task - Status).
- To update a Task, click the arrow
 next to the Patient name.
- To view the next assigned Task, click the arrow next to Next priority.
For more information, click here.
 Top of Page