Using E-Prescribe
- General information
- Launch E-Prescribe
- Step-by-step
- What happens when the E-Prescribe button is clicked?
- Related topics
General information
By law in the United States, all prescriptions must be sent electronically. The MaximEyes® SQL feature, E-Prescribe, provides a link between MaximEyes SQL and the DrFirst e-prescribing product, Rcopia, which meets Certification Commission for Health Information Technology (CCHIT) e-prescribing requirements.
- Diagram showing the MaximEyes SQL workflow for e-prescriptions (single patient prescription).
- Description of the DrFirst product, RcopiaTM.
Launch E-Prescribe
There are three ways to launch E-Prescribe for a selected patient:
- From within an Encounter, click the E-Prescribe icon on the Medication History Element.
- From within an Encounter, click the E-Prescribe icon on the Medications for This Encounter Element.
- From the Patient Navigation list, select Patient Medications and click the E-Prescribe button on the Main toolbar of the Patient Medications window.
Note: When a prescription is generated from the Patient Medications window, MaximEyes SQL automatically creates and saves a special Encounter, the Medication Rx without Patient Visit, which is added to the Patient Record. For more information about this special Encounter, click here.
Step-by-step
- To use E-Prescribe, you must first find a Patient Record. For help, click here.
- For the desired Patient Record, click the View button
 (or anywhere on the Patient Record row) or click the Edit button
  .
.
- The corresponding Patient Record window (View Patient Record or Edit Patient Record) displays in the Contents Pane.
- The Patient Navigation list displays the selected patient's name and a navigation tree for accessing the patient's Record, Encounters, Optical, Medications and Cataract Surgery Sheet.
Note: For those patients who have not had cataract surgery, a message to this effect displays when Cataracts Surgery Sheet is clicked.
- Launch E-Prescribe from:
- a Patient Encounter
- the Patient Medications window
Launch E-Prescribe from a Patient Encounter
- Create a new Encounter or select an existing Encounter to edit.
- As desired, navigate to the Medication History Element (usually found on the Chief Complaint & HPI page) or the Medications for this Encounter Element (usually found on the Final Findings page).
- Click the E-Prescribe icon
 in the upper-right corner of the Element. E-Prescribe launches in a new window. Click here for more information.
Launch E-Prescribe from the Patient Medications window
- In the Patient Navigation list, select Patient Medications.
- The Patient Medications window displays. For more information about this window, click here.
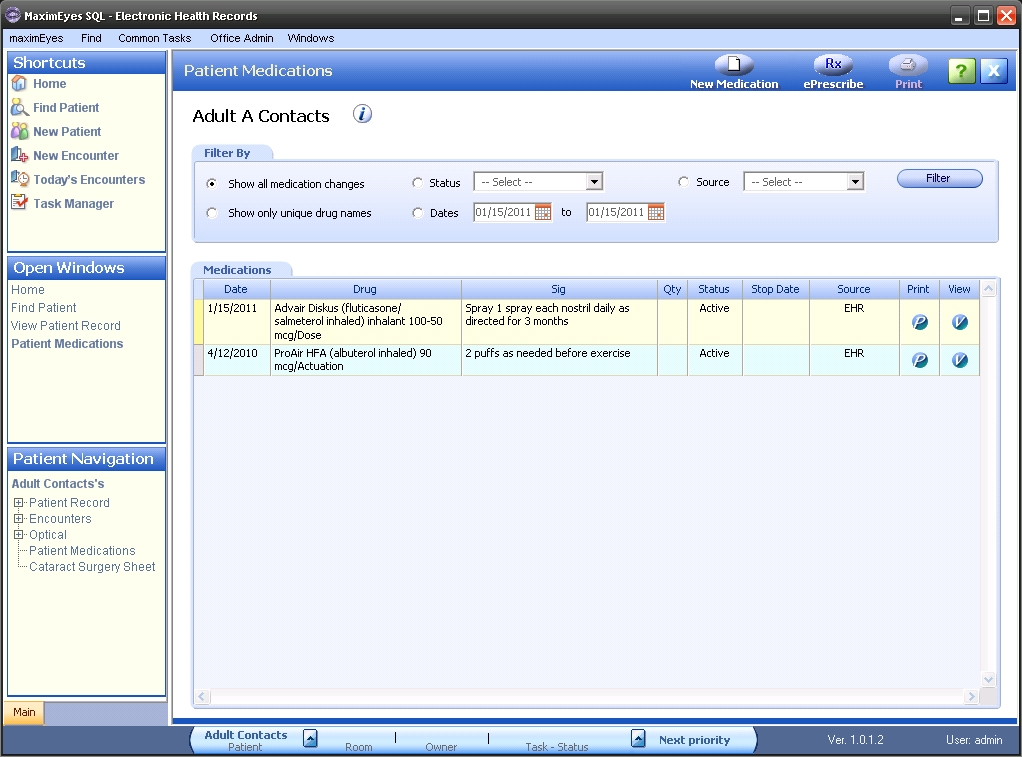
- Click the E-Prescribe button. E-Prescribe launches in a new window. Click here for more information.
What happens when the E-Prescribe icon/button is clicked?
To view a diagram showing the following workflow for e-prescriptions (single patient prescription), click here.
- MaximEyes SQL determines whether data needs to be uploaded to Rcopia before navigating the user to the Rcopia Website. Depending on the scenario, the following data is uploaded from MaximEyes SQL to Rcopia:
Data Uploaded When Patient demographic information (name, address, etc.) The current Patient has not been uploaded to Rcopia before (i.e., the patient's Rcopia Id is blank). Updated patient information The current patient has been uploaded to Rcopia before, but there have been changes to some of his/her demographic information (for example, an address change).
The necessary Allergy information The current patient has Allergy information that has been entered in the Allergies Element and has never been sent to Rcopia before.
The necessary Medication History The current patient has Medications entered in the Medication History Element that have never been sent to Rcopia before (i.e., the Medication's Rcopia Id is blank)
OR
A Medication that has been sent to Rcopia before has changed in MaximEyes SQL (for example, its Status has changed from Active to Stopped, or its Dose Amount has changed from 1 to 2).
Note: Each data item (Patient Information, Allergy, Medication, etc.) that is uploaded to Rcopia is tracked by Rcopia so that if this data is updated on MaximEyes SQL, Rcopia knows to update the data record instead of creating a new one.
- As each step of the upload process occurs, a progress message displays.
- Once the necessary data has been uploaded, a popup window opens, navigating the user to the Rcopia Website.
- The user is automatically logged in to Rcopia.
- The current Patient's record displays.
For more information about Rcopia, click here.
 Top of Page