Medication History Element
- General information
- When a new Encounter is created
- Element description
- Open Data Entry Screen
- Launch E-Prescribe
- Medication History Element grid
- Updating Medication History when ePrescribe is not being used
- Related topics
General information
The Medication History Element displays all the Medication data from Patient Encounters dated before the date of the current Patient Encounter.
- This Element is usually found on the Chief Complaint & HPI page of an Encounter.
- Medication history data can be manually entered by the user, or it can be imported from a practice management program such as MaximEyes® Practice Management System (i.e., taken from the Welcome Form).
- The user can indicate that the patient takes no Medications.
- The user can indicate which user has reviewed the Medication History.
When a new Encounter is created
Depending on how the System Preferences are configured, the following categories of Medications are copied to the Medication History Element when a new Encounter is created:
- All previous Medications.
- Only Medications with a Status of Active or Pending.
- Only Medications with a Status of Active or Pending with a Source of EHR, EHR - Dr, EHR - Tech or Rcopia.
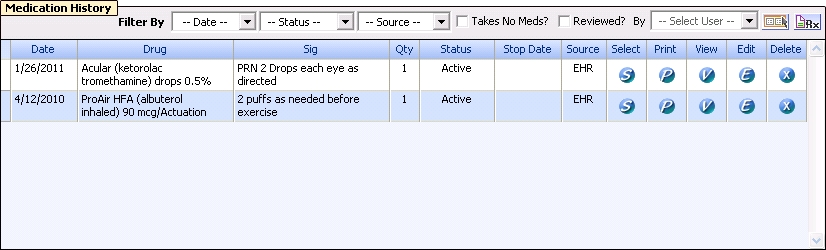
Element description
By default, Medications with a Status of Active display at the top, in descending chronological order by date added to the Patient Record. An Active Medication is one that does not have a Stop Date or whose Status is not Stopped.
Filter By
Select to filter Medications by:
- Date (displays all dates of listed Medications)
- Status (Active, Pending or Stopped)
- Source (EHR, EHR - Dr, EHR - Tech, Patient, PMS, Rcopia or Welcome Form)
- Select to filter by a Status of Pending.
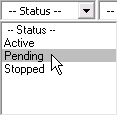
All Medications with a Status of Pending display.
- Select to filter by a Status of -- Status --.
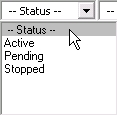
All Medications display.
Take No Meds?
If this check box is checked when there are active Medications displayed in the element, an error displays and the check box cannot be checked.
If this check box is checked and a Medication is added later to the Encounter, the check box is automatically unchecked.
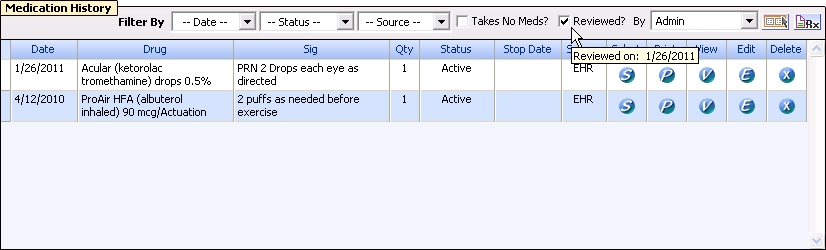
Reviewed By
When the Reviewed? check box is checked, MaximEyes SQL records the current date as the Reviewed Date.
- The By field defaults to the logged-in user name. Select a different reviewer from the drop-down box, if desired.
- When the check box is checked, the Reviewed date displays when the mouse hovers over Reviewed?
Open Data Entry Screen 
- Click this icon to display the Medication History - Data Entry screen.
- The Date field displays today's date.
- The Substitutions Permitted? field is checked.
- The Source field displays EHR.
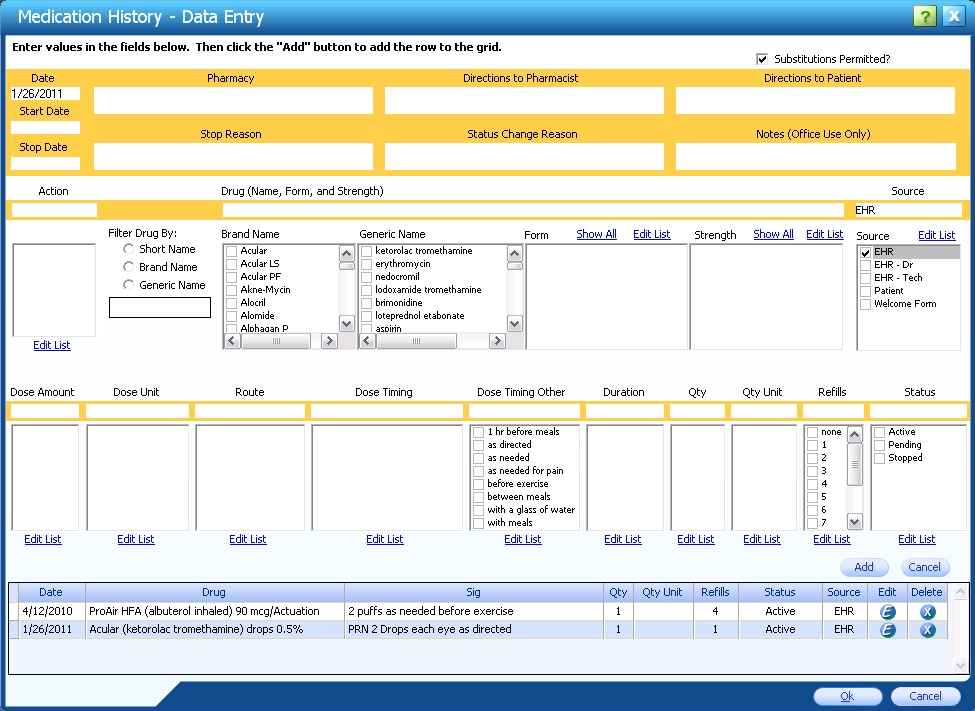
- Complete the appropriate fields. As a field is selected, it is highlighted in light green.
- To edit the Value List for a field, click the Edit List link for that field.
- Click the Add button above the grid at the bottom of the window to add the Medication to the grid.
- If any required fields are missing, a warning displays.
- Click the Cancel button above the grid at the bottom of the window to clear the fields without adding the Medication to the grid.
- Repeat Steps 2 - 4 above to add additional Medications to the grid, as desired.
- To add the Medication(s) to the Medication History Element, click the OK button.
- To close the Medication History - Data Entry window without adding a Medication(s) to the Medication History Element, click the Cancel button.
If data has been entered in the fields and/or a Medication has been added to the grid, a warning displays; click Yes to close the Medication History - Data Entry screen without saving or click No to continue adding Medications.
Edit a Medication in the grid
- Click the Edit button
 in the row of the Medication you wish to edit. The Medication History - Data Entry screen updates to display the details for the selected Medication.
- Make changes as desired.
- Click the Update button above the grid at the bottom of the window to update the Medication record.
- Click the Cancel button above the grid at the bottom of the window to clear the details for the selected Medication from the Medication History - Data Entry screen.
Delete a Medication from the grid
Note:This also deletes the Medication from the Patient Record.
- Click the Delete button
 in the row of the Medication you wish to delete. A warning displays.
- Click Yes to confirm the deletion. The Medication no longer displays in the Medication History - Data Entry screen and is deleted from the Patient Record.
- Click No to cancel the deletion and return to the Medication History - Data Entry screen.
Launch E-Prescribe 
Click this icon to launch the DrFirst e-prescribing product, Rcopia, in a new window.
- For information about what happens when E-Prescribe is launched, click here.
- To view a diagram showing the E-Prescribe Workflow (single patient prescription), click here.
- For a description of the DrFirst product, Rcopia, click here.
Note: Any new Medications entered by the user on Rcopia are downloaded and added to the Medication History Element when the user closes the Rcopia window.
- If a downloaded Medication previously had a Status of Pending in the Medication History Element, the system updates the Status to Active.
- New Medications downloaded include any prescriptions that were created in the current Rcopia session and were sent to the pharmacy on Rcopia.
- New Medications downloaded also include any Medications that the user searched for using the Pharmacy Benefit Management (PBM) database (in other words, searched the PBM database to find any Medications that another doctor from another practice prescribed for this patient), and for which the user added to the list of Medications for this patient on Rcopia.
Medication History Element grid

The following information is displayed for each Medication:
| Field | Description |
|---|---|
| Date |
Date prescribed.
|
| Drug |
Brand name (generic name), Form and Strength.
|
| Sig |
Dose Amount, Dose Unit, Route, Dose Timing, Dose Timing Other and Duration (as applicable).
|
| Qty |
Quantity
|
| Status |
Active, Pending or Stopped.
|
| Stop Date |
Date prescription stops.
|
| Source |
EHR, EHR - Dr., EHR - Tech, Patient, PMS (Practice Management Software) or Welcome Form.
|
Buttons
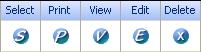
These buttons display at the right end of each Medication row in the lower section of the Medication History Element. Click the following buttons in the corresponding row of a Medication to perform these actions:
| Button | Action |
|---|---|

|
Select the Medication to be entered in the Medication for this Encounter Element. The Medication must have a Status of Active (Continue) to be entered.
|

|
Print the Medication.
|

|
Display the View Medication popup. These fields are view-only.
For help on editing an Encounter, click here. |
|
|
Open the Medication History - Data Entry screen with the fields populated with the data for the selected Medication.
|
|
|
Delete the Medication. A warning displays.
|
Updating Medication History when ePrescribe is not being used
If E-Prescribe is not being used, then the the System Preferences option, Update Medication History element by from the Medications for this Encounter element after saving a patient encounter should be selected.
With this option selected, when a Patient Encounter is saved, any new records that have been entered in the Medications for this Encounter Element that have a Status of Pending or Active (New) are added to the Medication History Element.
 Top of Page