Create New Encounter Form
Different Encounter Forms can be created for different Types of exams to be performed.
- General Information
- Step-by-step
- Saving the New Encounter Form
- Add more Encounter Form pages
- View Usage Button
- Related topics
General Information
Encounter Form Sections
- An Encounter Form can be divided into different sections called pages.
- For each page, the user can assign Encounter Elements to it.
- An Encounter Form must contain at least one page.
- Blank pages (those which do not contain any Elements) are automatically removed when the Encounter Form is saved.
Exam Elements and History Elements
All the Encounter Elements in the system are classified as one of three Types, depending on the context in which they are used:
- Exam
- History
- Both
When creating an Encounter Form, the Encounter Elements display in a list that is organized into two sections: Exam and History.
- All Exam Elements (for example, Auto-Refractor, Blood Sugar, Final Diagnoses) display in the Exam section.
- All History Elements (for example, Birth History, Drug Allergies) display in the History section.
- Elements that are common to both types (for example, Chief Complaints) display in both sections.
Cancel Creating an Encounter Form
At any time during the Encounter Form creation process, click the Cancel button in the New Encounter Form Main toolbar to stop creating the Encounter Form and return to the Encounter Forms window. All changes made are lost.
Step-by-step
- Open the Encounter Forms window (for help, click here).
- Click the New Encounter Form button in the Encounter Forms window Main toolbar.
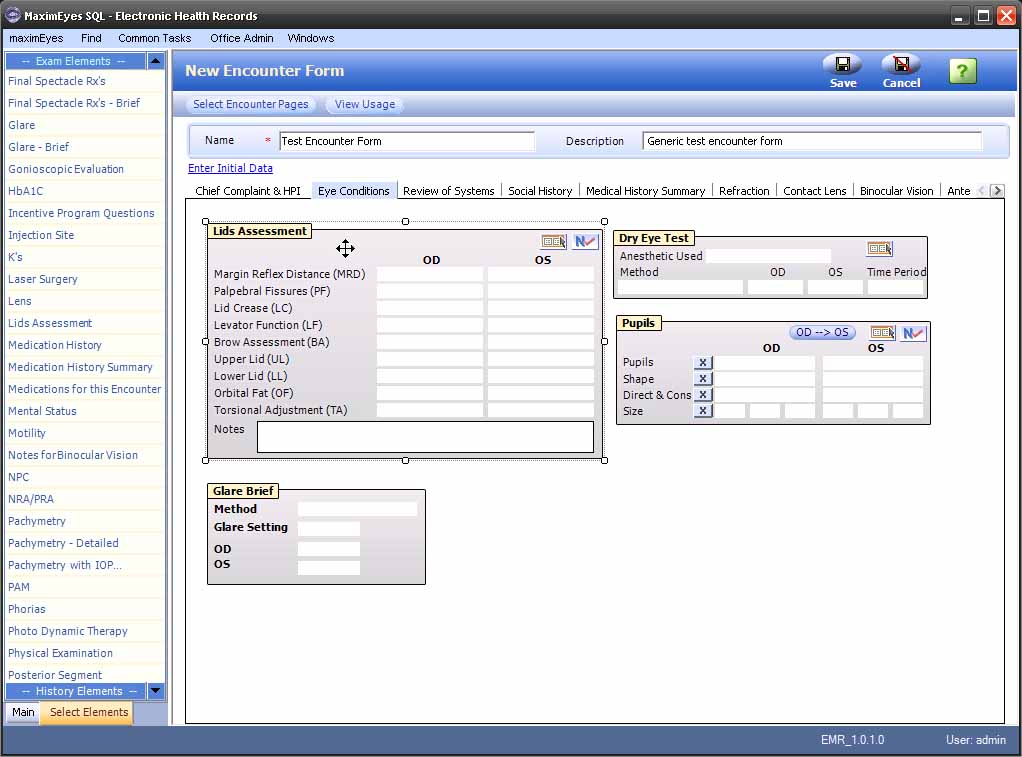
- The New Encounter Form window displays.
- The Left Pane displays the Elements list, with the Exam Elements list tab at the top and the History Elements list tab at the bottom.
- The Right Pane displays the Select Encounter Pages popup on top of the New Encounter Form window.
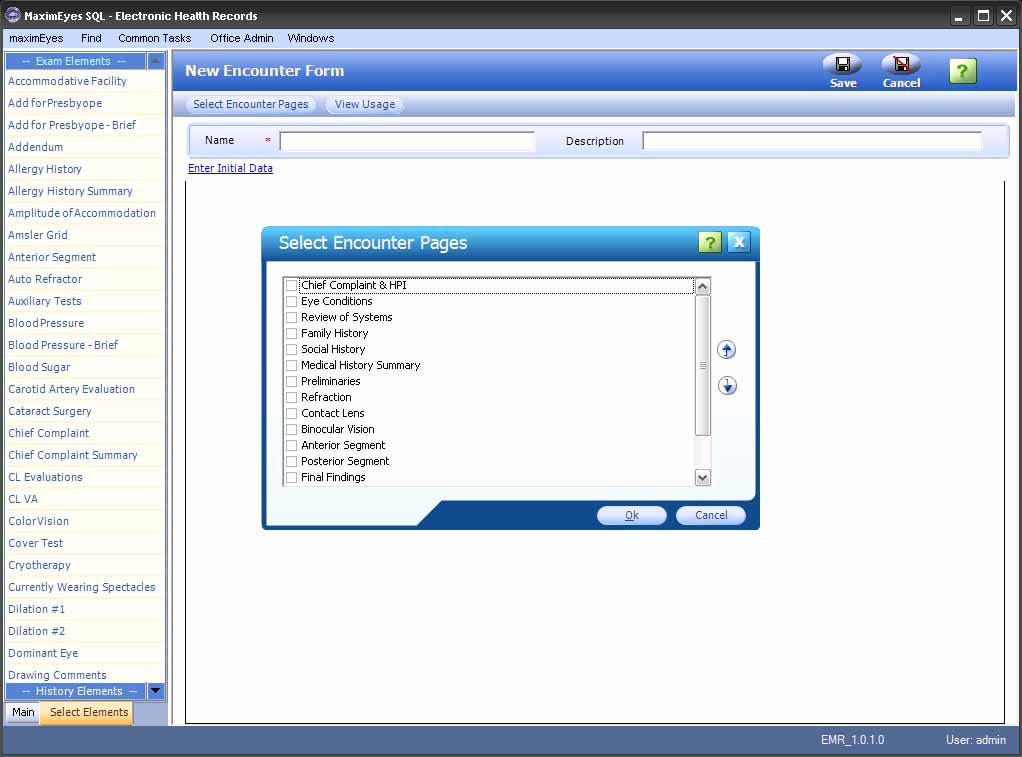
- In the Select Encounter Pages popup, use the mouse to select and order the pages to include in the Encounter Form (for help, click here).
- Click the OK button to exit the Select Encounter Pages popup and save changes.
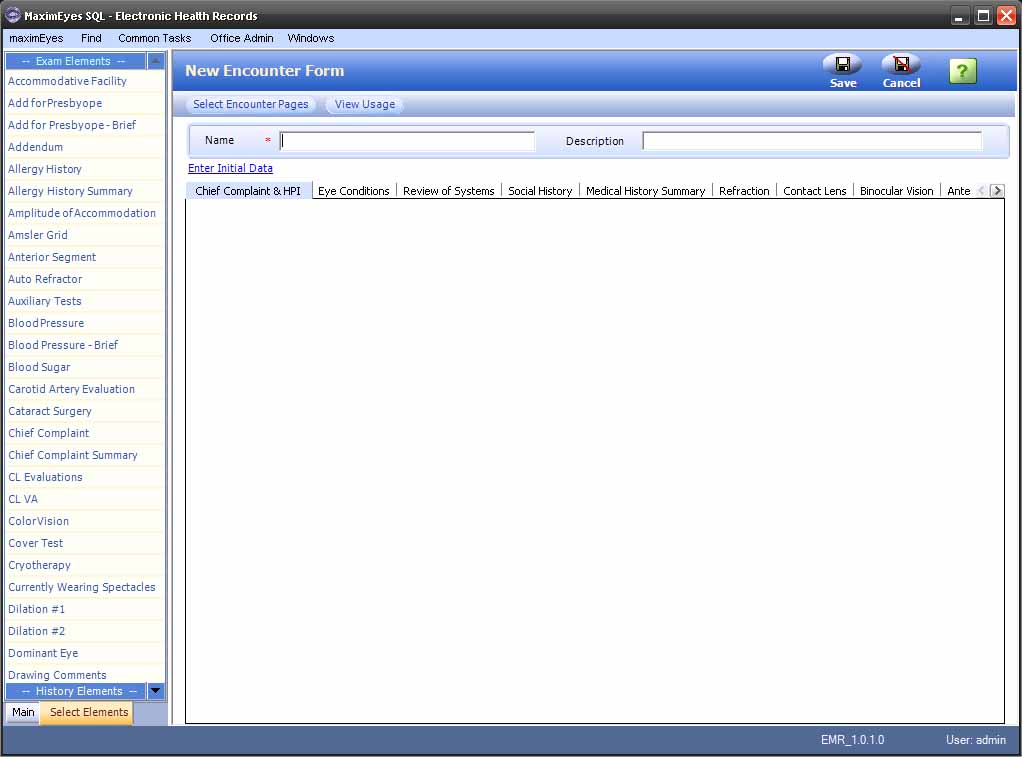
- The new Encounter Form displays.
- The Left Pane displays the Elements list, with the Exam Elements tab at the top and the History Elements tab at the bottom.
- The Right Pane displays the New Encounter Form window.
- The cursor is in the Name field.
- The Name and Description fields are blank.
- The Enter Initial Data link displays.
- The selected pages display horizontally as a tabbed list below the Enter Initial Data link, with the first tab highlighted in blue.
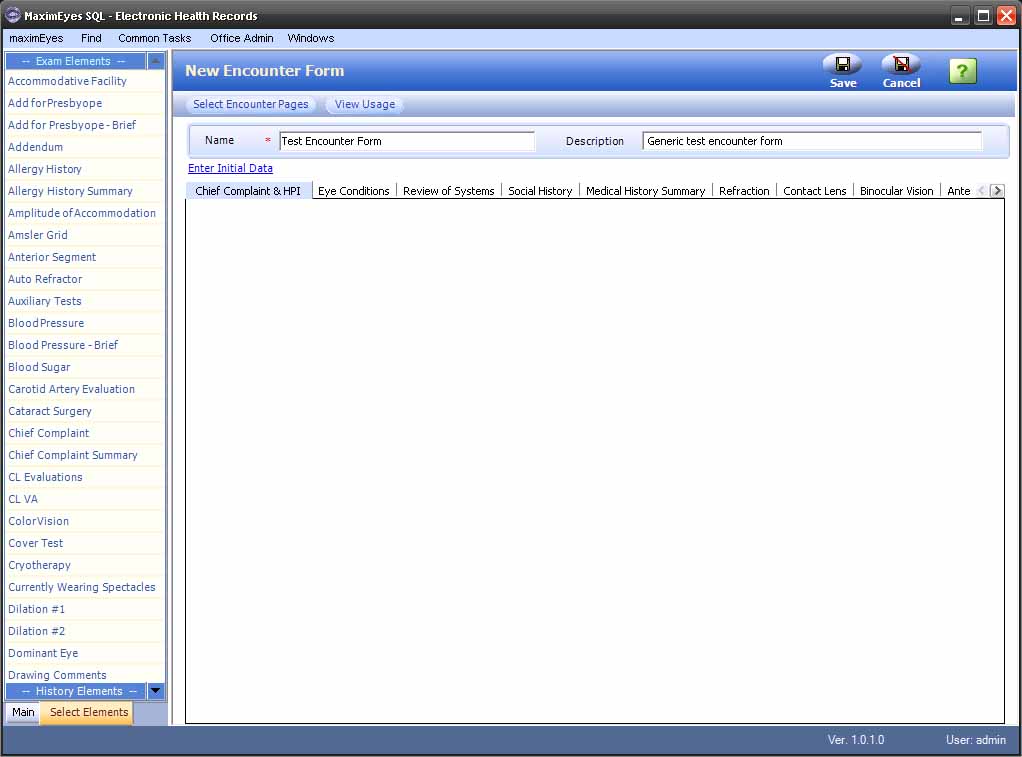
- Enter the Name and (optional) Description of the Encounter Form.
Note: An Encounter Form must have a name and, optionally, a description. If any field is selected before the Name field is filled in, the warning icon
 flashes to the right of the Name field as a reminder to name the Encounter Form.
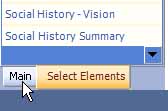
Navigating the Left Pane
The Left Pane of the New Encounter Form window contains the Exam and History Elements lists, as well as tabs to quickly navigate between the Main Left Pane navigation and the Select Elements pane.
 |
|
 and Scroll Down
  icons to move through the Elements lists.

 at the bottom of the Left Pane. The New Encounter Form window continues to display in the Contents Pane.
Add an Element to an Encounter Form page
Elements can be easily added to an Encounter Form page by dragging and dropping the Element onto the page.
- Select the Encounter Form page by clicking the Page Name tab. The selected tab displays highlighted in blue.
- From the Element list in the Left Pane, drag and drop Elements one at a time onto the Right Pane below the selected Encounter Form page.
- As needed, horizontal and vertical scroll bars appear around the Encounter Form page design area as Elements are added to each page.
Note: The system will not allow you to add duplicate Elements to an Encounter Form page.
Position an Encounter Element
- Left-click the Element to select it.
- The Element is highlighted.
- When the mouse hovers over the Element, it changes to a four-headed arrow.
- Use the keyboard arrows to move the Element to the desired position.
Alternatively, left-click the Element to move and, while holding the mouse button down, drag the Element into position. - To de-select the Element, click anywhere on the currently-selected Encounter page outside the Element.
Add Elements to additional Encounter Form pages
- To select another page to which to add Elements, click its Page Name tab in the horizontal list below the Enter Initial Data link.

- If the desired page does not display in the list, use the left and right arrows
 at the right end of the horizontal Page Name list to scroll through the list.
- The selected page is highlighted in blue.
- If the desired page does not display in the list, use the left and right arrows
- Continue adding Elements to the page(s) using the methods described above.
Remove an Encounter Element from an Encounter Page
- Right-click the Element you wish to remove.
- Select Remove This Element from the drop-down list.
The Element no longer displays on the page.
Set up Initial Values
Once all Elements have been placed on the Encounter page(s), initial (default) data can be entered for those Elements that support it. Doing this saves time later, since the initial data is automatically filled when a new Patient Encounter is created using the Encounter Form.
Note: If an Element does not support the Initial Data feature, it displays as disabled (the Element component label is grayed-out) when the Enter Initial Data link is clicked.
To set up initial values, do the following:
- Select the page to whose Elements you wish to add initial data values by clicking the Page Name in the horizontal tabbed list. The selected tab displays highlighted in blue.
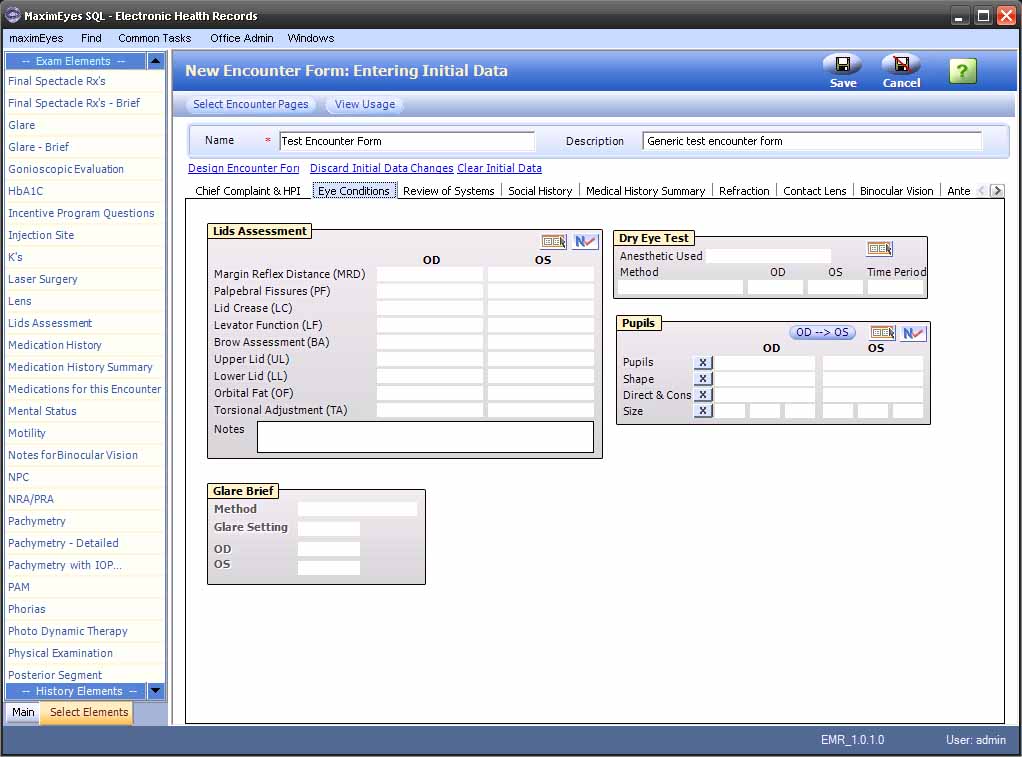
- Click the Enter Initial Data link, located below the Name field.
- The New Encounter Form: Entering Initial Data window displays.
- The Enter Initial Data link is replaced by three links: Design Encounter Form, Discard Initial Data Changes and Clear Initial Data.
- The names of those Elements that do not support Initial Data values display as disabled (grayed-out).
In the example below, the Glare - Brief Element field labels (Method, Glare Setting, OD and OS) are grayed-out because they do not support Initial Data values.
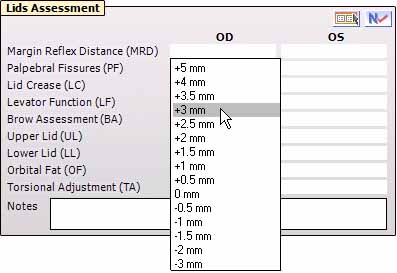
- For each Element that does support Initial Data values, select its fields individually (by using the Tab key or left mouse button) to enter those values.
- Enter values by either:
- Selecting from the drop-down list.
- Enter values using the keyboard.
Clearing data
There are several ways to clear data from the fields of an Element, depending on the data input method for the Element:
- Click the Clear Data button
 next to a field to clear the data from only that field.
- Click the Clear All link to clear the data from all the Element's fields. This link displays on Elements whose fields are selected using radio buttons.

- Use the backspace or Delete key to remove data from fields that support inputting data using the keyboard.
- Click the Clear Initial Data link to remove initial data from all Form Elements on the currently-selected page. The New Encounter Form: Entering Initial Data window continues to display.
Continue designing the new Encounter Form
- To save Initial Data values and return to the New Encounter Form window, click the Design Encounter Formlink.
- To cancel changes made to the Initial Data and return to the New Encounter Form window, click the Discard Initial Data Changeslink.
Note: To edit Initial Data values after returning to the New Encounter Form window, click the Enter Initial Datalink.
Saving the new Encounter Form
After all Encounter Form pages have been designed, save the new Encounter Form by clicking the Save button on the Main toolbar.
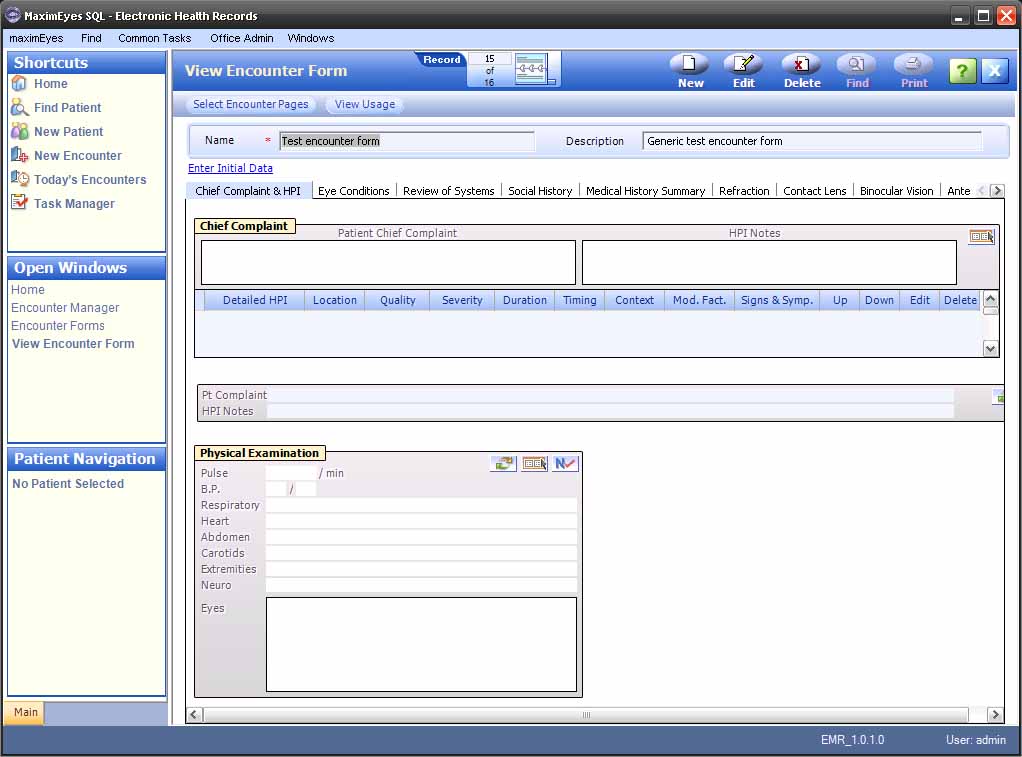
- The View Encounter Form window displays in the Contents Pane. For more information, click here.
- The Left Pane displays the Main navigation.
- The Contents Pane displays the new Encounter Form.
- The Name field is highlighted.
- The Rolodex in the Main toolbar displays the updated count of Encounter Forms on the system.
- The new Encounter Form name displays at the end of the Encounter Forms list in the Encounter Forms window.
Note: All Encounter Form names must be unique. If you try to save an Encounter Form using an existing form name, an error message will display.
To close the New Encounter Form window without creating a new Encounter Form, click the Cancel button on the Main toolbar.
- The New Encounter Form window closes.
- The Encounter Forms window displays in the Contents Pane.
- The Open Windows list in the Left Pane displays Encounter Forms.
Add more Encounter Form pages
- Click the Select Encounter Pages button in the Secondary toolbar.
- The Select Encounter popup displays. For help, click here.
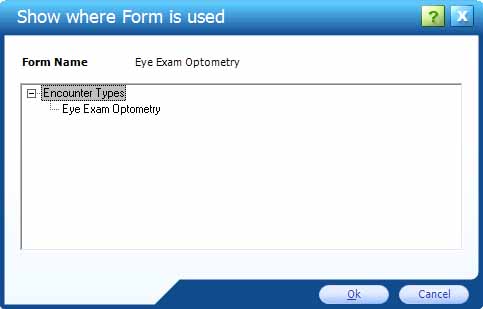
View Usage button
To view the Encounter types to which the Encounter Form is linked, click the View Usage button in the Secondary toolbar.
- The Show where Form is used popup displays the Form name and a tree diagram showing the Encounter Type(s) to which the form is linked.
- Click the OK or Cancel buttons to close the popup.
 Top of Page