Cataract Surgery Workflow
During the Patient Encounter (either a Cataract Evaluation Exam or a regular exam), the decision is made to have cataract surgery done.
Step-by-step
To view a diagram showing the Cataract Surgery Workflow, click here.
- Fill out the Cataract Surgery Request Element found on the Encounter Form (for more information, click here).
- Click the Send Task link on the Cataract Surgery Request Element to create Tasks that must be performed prior to the cataract surgery.
- If needed, use the Auxiliary Tests Element on the Encounter Form to enter an order for other tests, such as Topography (for more information, click here).
- Save the Encounter when it is finished. When the Encounter is saved:
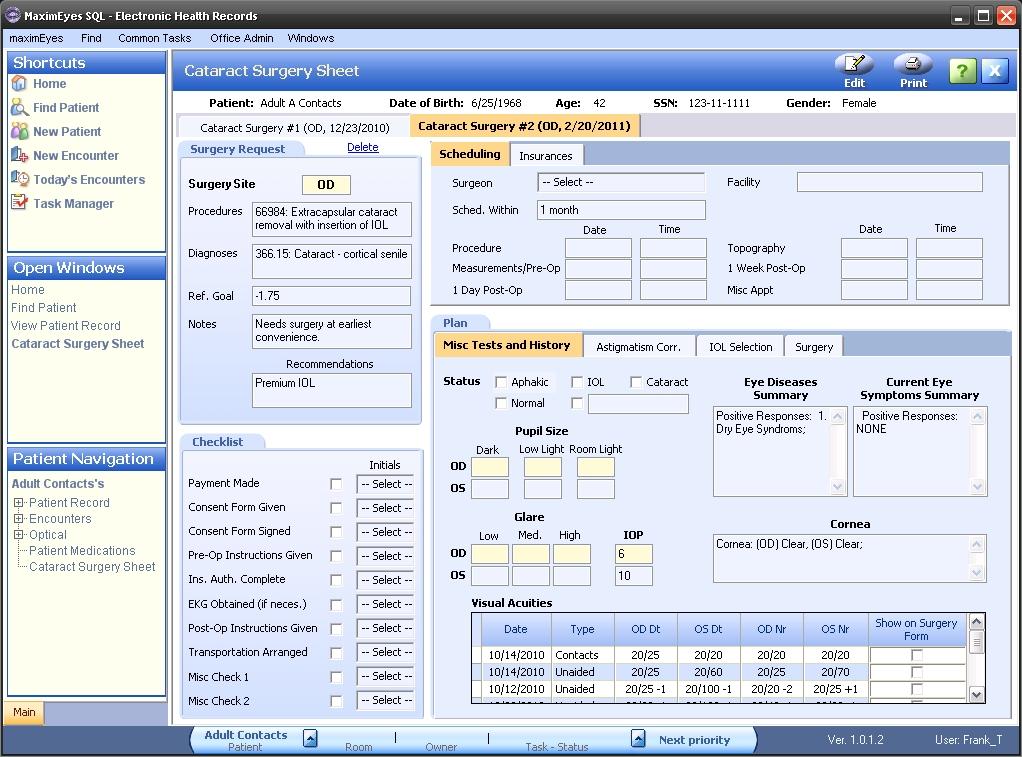
- The information from the Cataract Surgery Request is transferred to the patient's Cataract Surgery Sheet (for more information, click here).
- All Tasks that were created using the Cataract Surgery Request Element and Auxiliary Tests Element:
- Are sent to the assigned staff person to complete.
- Display in the respective owner's My Task List.
- The following requisite Tasks are complete (have a Status of Completed):
- Any Tasks that were generated in the Cataract Surgery Request Element.
- Any Tasks that were generated in the Auxiliary Tests Element.
- The Task, "Ready for Cat. Surg. Plan," is automatically sent to the doctor.
- On the Plan tab of the Cataract Surgery Sheet:
- Review all the data from the patient's test results and measurements.
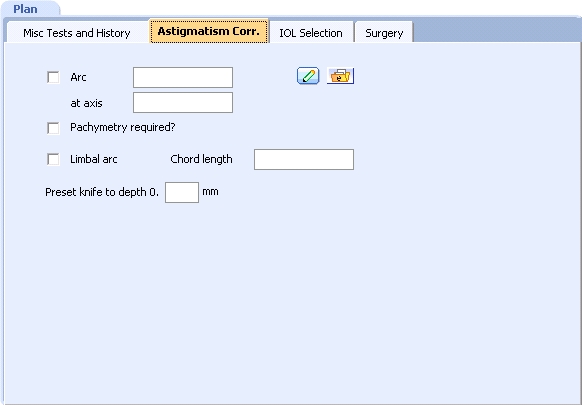
- If an astigmatism correction is necessary, enter the required information on the Astigmatism Corr. tab.
- As needed, launch the 3D Precision Draw tool to draw the Arc information and/or launch the eFile Manager to associate eFiles with the Cataract Surgery Sheet.
- Using all the available information on the Cataract Surgery Sheet, choose and enter the Selected IOLs.
- Optionally, use the IOL Matrix tabs to choose an IOL Model and enter various powers and targets for each eye.
- Click the Surgery Form link on the IOL Selection tab to select and print a surgery form, which includes all the necessary information from the Cataract Surgery Sheet for the day of surgery.
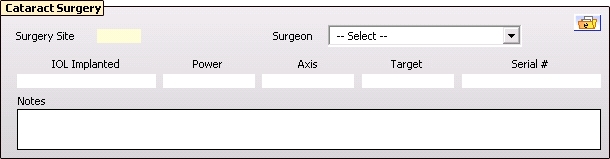
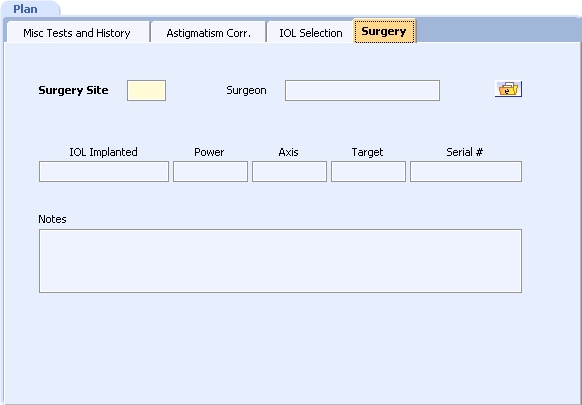
- On the day of surgery, create a new Cataract Surgery Encounter and use the Cataract Surgery Element to enter information about the actual IOL that was implanted.
- Click the Show eFiles
 icon on the Cataract Surgery Element to scan the IOL stickers that were used.
- For reference, the Cataract Surgery Element data is automatically copied to the Surgery tab on the Cataract Surgery Sheet.
- Click the Show eFiles
 Top of Page
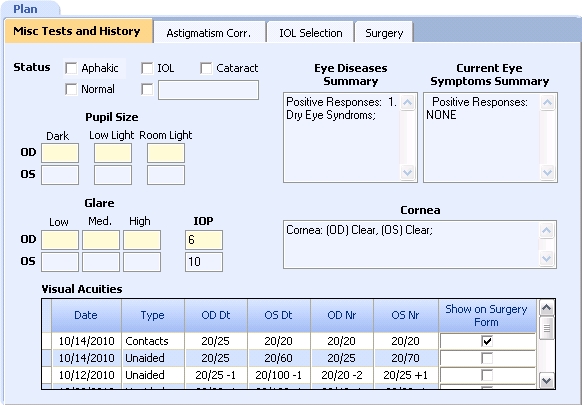