Auxiliary Tests Element
The Auxiliary Tests Element is used to enter an Order for tests, such as Automated VF, Topography or Ultrasound. When the Encounter is saved, a Task is sent to the appropriate staff person to complete the Order.
Step-by-step
- Find the desired Patient Record. For help, click here.
- Create a new Encounter or select an Encounter to edit.
- Navigate to the Encounter form page that contains the Auxiliary Tests Element (for help, click here). It displays in the Contents pane.
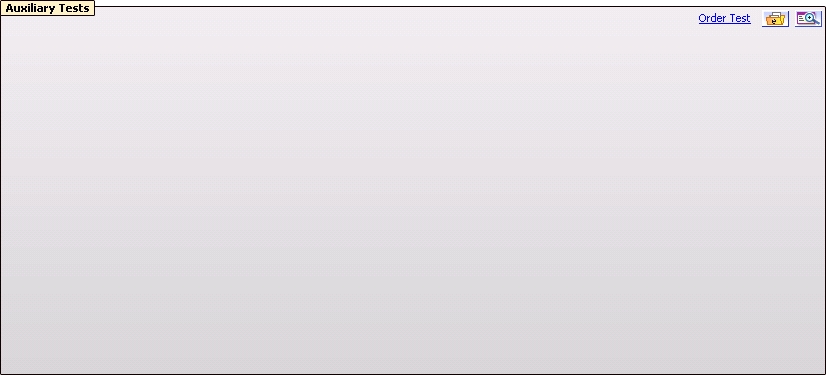
- Click the Order Test link in the upper-right corner of the Auxiliary Tests Element. The Auxiliary Test Order popup displays.
- The cursor is in the Category field, which is highlighted in light green.
- Required fields are marked with a red asterisk. *
- By default:
- All Users is selected in the Send Task To field.
- The Ordered checkbox is selected.
- Today's date displays in the Due Date field.
- When a field value is selected, it is highlighted in gray.
- When a Category is selected, the other fields display values, as appropriate.
- To edit the Value List for a field, click its respective Edit List link.
- As needed, use the scroll bar on the right of the field to scroll up and down.
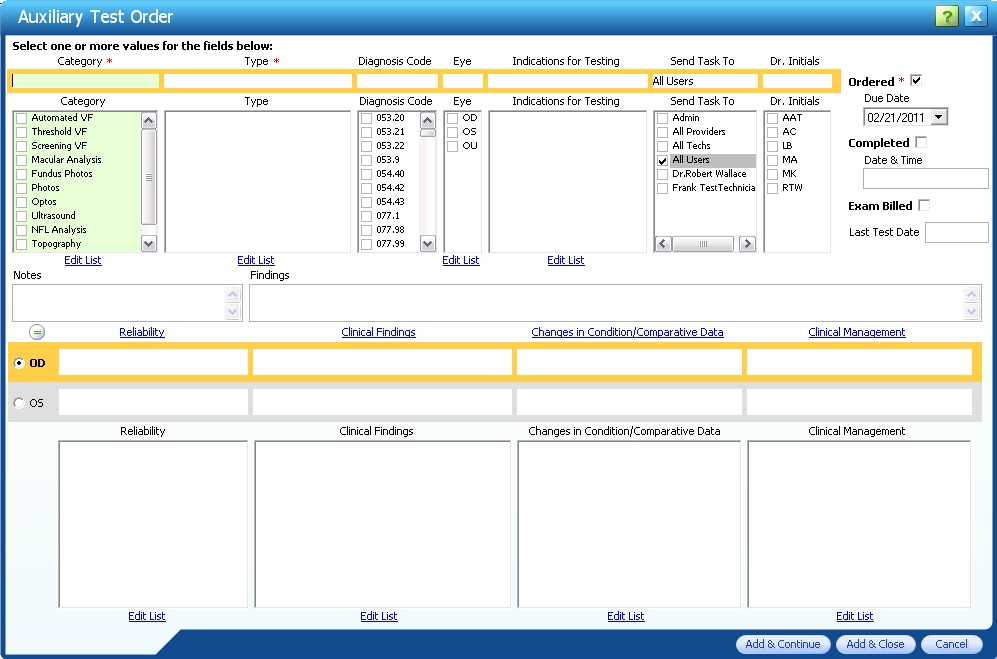
- Make selections and enter data, as desired.
- Select values for Reliability, Clinical Findings, Changes in Condition/Comparative Data and Clinical Management individually for each eye by selecting the appropriate OD or OS button.
- To automatically copy the OD values to the OS row, click the Copy Values button
 below the Notes field.
- To add another Test Order and continue, click the Add & Continue button.
- The fields are reset.
- The cursor is in the Category field, which is highlighted in light green.
- To add a Test Order and close the popup, click the Add & Close button.
- The Auxiliary Test Order popup closes.
- The Auxiliary Tests Element displays.
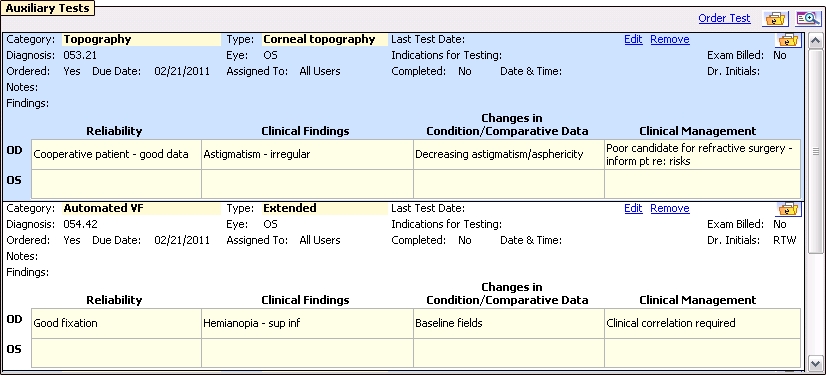
- The Show eFiles icon
 displays in the upper-right corner of the Element.
- Tests display in descending chronological order, with the most recently-ordered Test at the top.
Edit a test
- Click the Edit link on the Test you wish to edit. The Auxiliary Test Order popup displays.
- Make changes to the displayed field values, as desired.
- The Ordered checkbox is inactive.
- When the Completed checkbox is selected, the Date & Time field displays the date and time at which the checkbox is selected.
- To close the popup and save changes, click the OK button. The Auxiliary Tests Element displays.
- To close the popup without saving changes, click the Cancel button. The Auxiliary Tests Element displays.
Note: When an Order is completed, a Task is automatically sent to the doctor to inform him/her.
Remove a test
- Click the Remove link on the Test you wish to remove. A warning displays.
- Click the Yes button to confirm the deletion. The Test no longer displays in the Auxiliary Tests Element.
- Click the No button to cancel the deletion.
Note: Completed Tests cannot be removed.
Associate an eFile with a Test
- Click the Show eFiles icon in the upper-right corner of the Test. The eFiles - Auxiliary Tests popup displays.

- Use the icons at the top of the popup to associate an eFile(s) with the Test. For help, click here.
- When done, click the red X in the upper-right corner of the popup.
- The popup closes and the Auxiliary Tests Element displays.
- The Show eFiles icon displays an asterisk
 to indicate eFiles are associated with the Test.
Full View
Click this icon  to open a popup window that displays all data for the Auxiliary Tests Element.
 Top of Page