Edit Cataract Surgery Sheet
When an Encounter that includes a completed Cataract Surgery Request Element is saved, the information is transferred to the patient's Cataract Surgery Sheet.
- Step-by-step
- General Patient information
- Cataract Surgery # tab
- Cataract Surgery Sheet sections
- Related topics
Step-by-step
- Find the desired Patient Record. For help, click here.
- In the Patient Navigation list for the selected patient, click Cataract Surgery Sheet.
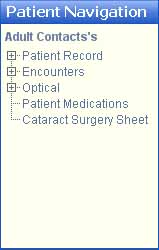
- The Cataract Surgery Sheet displays in the Contents pane.
- Click the Edit button in the Main toolbar. The Contents pane refreshes to display the Edit Cataract Surgery Sheet.

General Patient information
This section displays basic demographic information for the patient and is taken from the Patient Record. All fields are view-only.

Cataract Surgery # tab
If more than one Cataract Surgery exists for a patient, the Sheet for each Surgery displays on a separate tab. Click the corresponding tab to view the desired Cataract Surgery Sheet.
- The selected tab is highlighted in orange.
- The tab displays the following information: Cataract Surgery # (Surgery Site, Date surgery performed)

Cataract Surgery Sheet sections
The information in these sections is transferred from the completed Cataract Surgery Request Element to the Cataract Surgery Sheet when the Encounter is saved.
Some fields are view-only; some can be edited.
Surgery Request tab
This tab displays the non-scheduling information from the Cataract Surgery Request Element.
- All fields are view-only.
- To change the information, you must edit the Cataract Surgery Request Element.

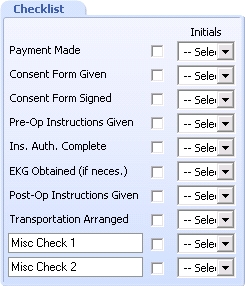
Checklist tab
Use this tab to track the various Tasks that must be completed and signed off during the Cataract Surgery process.
As a Task is completed:
- Mark the corresponding checkbox.
- Select the initials of the User who completed the Task from the drop-down list.
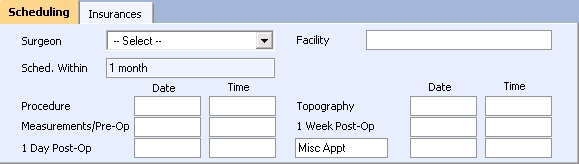
Scheduling tab
Use this tab to enter appointments that have been scheduled related to the Cataract Surgery.
When selected, this tab is highlighted in orange.
Note: All fields may be edited except Sched. Within, which is the surgery schedule date and is taken from the Cataract Surgery Request Element.
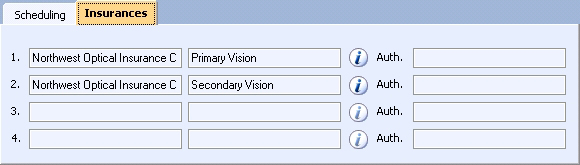
Insurances tab
Use this tab to enter and track authorizations obtained from the patient's insurance company(s).
When selected, this tab is highlighted in orange.
- All fields are view-only, except Auth..
- Enter authorization information directly into the Auth. field.
- Click the Information icon
 to display the Insurance Details popup for the corresponding insurance company.
- The insurance information is taken from the Patient Record.
- To edit the insurance information, you must edit the Insurance tab of the Patient Record.
Plan tab
This tab and its sections display the Cataract Surgery Plan information. As each section is selected, its tab is highlighted in orange.
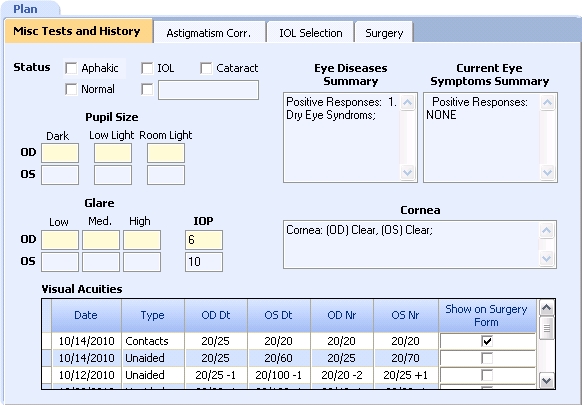
Misc Tests and History
This tab displays the data from the Eye Disease Summary, Current Eye Symptoms Summary and the Cornea data, which is taken from the most recent Encounter that contains the latest data for each of these Elements.
For example:
- The last Encounter contains the most recent Eye Disease Summary data, but does not contain the most recent Current Eye Symptoms Summary or Cornea data.
- The most recent data for the Current Eye Symptoms Summary Element and the Cornea Element are contained in the second-to-last Encounter and the third-to-last Encounter, respectively.
- Therefore, MaximEyes® SQL reads the appropriate data for these Elements from:
Element Read from Eye Disease Summary Last Encounter Current Eye Symptoms Summary Second-to-last Encounter Cornea Element Third-to-last Encounter
Similarly, this is done for reading data for the Pupils, IOP, VA, etc.
Note: MaximEyes SQL internally tracks the most recent data for these Elements so that if a second cataract surgery is performed, the Element data from the first cataract surgery is not changed.
Note: All fields are view-only, except Visual Acuities.
- Click the corresponding checkbox to select one Visual Acuities data to include on the Surgery Form.
- To edit the other fields, you must edit their respective Elements on the Patient Encounter.
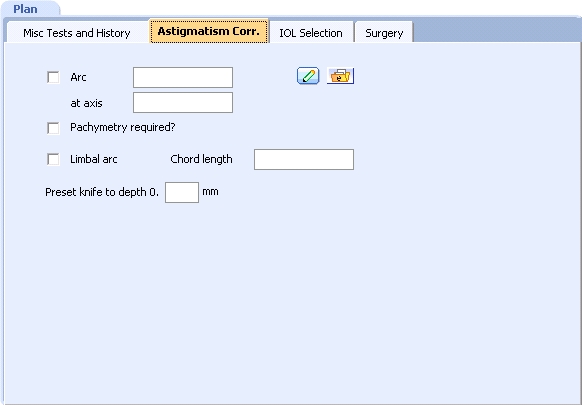
Astigmatism Correction tab
User this tab to record Astigmatism Correction data.
- Click the Invoke 3D Precision Draw icon
 to display Arc information drawn using the 3D Precision Draw tool that is associated with the Astigmatism Correction.
- Click the Show eFiles icon
 to view and/or select drawings or other eFile images associated with the Astigmatism Correction (for help, click here).
Note: If there are eFiles associated with the Astigmatism Correction, the Show eFiles icon displays with an asterisk.
If all eFiles are deleted, the Show eFiles icon once again displays without an asterisk.
IOL Selection tab
This tab displays:
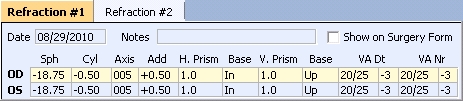
- All the Refractions and K's done for the patient.
- The IOL Measurements data that were entered on the IOL Measurements Element.
- The patient's chosen IOL Option.

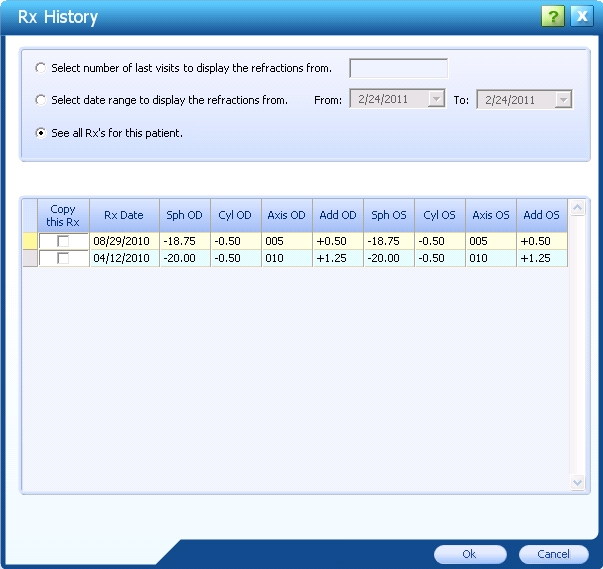
- Refractions: Click the Copy from Refraction History link to copy Refractions into the IOL Selection tab. The Rx History popup displays.
- Select prescription(s) to copy as desired and click the OK button.
- A maximum of three Refractions may be copied.
- Multiple Refractions display on individual tabs. The selected tab is highlighted in orange.
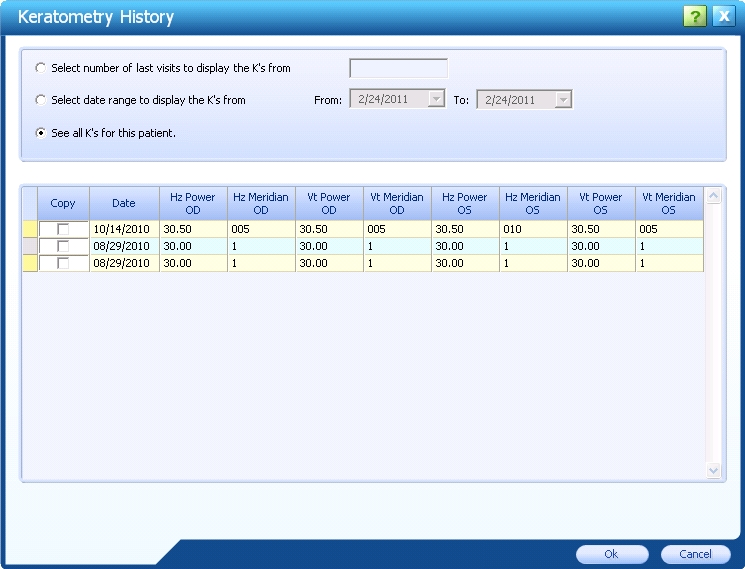
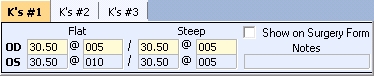
- K's: Click the Copy from K's History link to copy K's into the IOL Selection tab. The Keratometry History popup displays.
- Select K's to copy as desired and click the OK button.
- A maximum of three K's may be copied.
- Multiple K's display on individual tabs. The selected tab is highlighted in orange.
- Selected IOLs: Enter IOL Model data as desired.
- Click the Clear link to clear the entered data.
- Multiple Selected IOLs display on individual tabs.
- The selected tab is highlighted in orange.
- IOL Measurements fields: Display view-only measurements obtained from the IOL Master or Alcon OcuScan equipment. This data is taken from the IOL Measurements Element and must be edited from that Element.
Note: When the patient comes back for a Measurements/Pre-Op appointment, a Cataract Surgery Pre-Op Encounter can be created during which various tests and measurements are taken (for example, K's, Refractions, IOL measurements, etc.) and tracked in the Encounter.
- View Image History: Click this icon
 to open the Image Viewer popup to view and select images to associate with the Cataract Surgery.
- Show eFiles: Click this icon to view and/or select drawings or other eFile images associated with the IOL Measurements (for help, click here).
Note: If there are eFiles associated with the IOL Measurements, the Show eFiles icon displays with an asterisk.
If all eFiles are deleted, the Show eFiles icon once again displays without an asterisk.
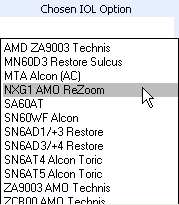
- Chosen IOL Option: Click this field to display the list of IOL Options.
- Select the desired IOL Option.
- To change the selection, delete the original selection to re-display the list of IOL Options.
- Notes: As desired, enter notes related to the IOL Selection.
- Surgery Form: Click this link to preview the Cataract Surgery Pre-Operative Data form.
- The form contains all the necessary information from the Cataract Surgery Sheet for the day of surgery.
- Click the Print button to print the form.
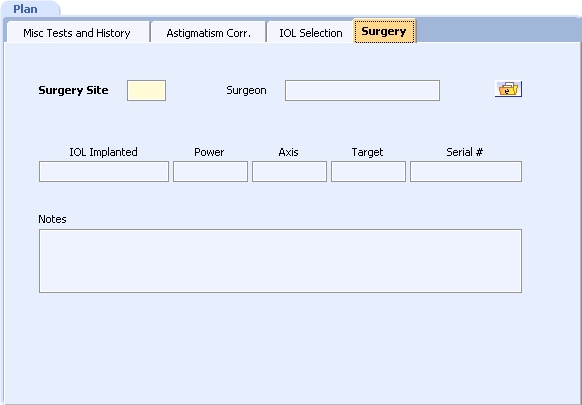
Surgery tab
The information displayed is transferred from the Cataract Surgery Element when the Post-OP Encounter is saved.
- The information is view-only.
- Click the Show eFiles icon to view and/or select drawings or other eFile images associated with the Cataract Surgery (for help, click here).
Note: If there are eFiles associated with the Cataract Surgery, the Show eFiles icon displays with an asterisk.
If all eFiles are deleted, the Show eFiles icon once again displays without an asterisk.
 Top of Page