Add Addendum Note to a Locked Encounter
An Encounter must be signed off before it can be locked. After it is locked, additional information may be added using the Addendum Note feature.
Step-by-step
- Find the Patient to whose Encounter you wish to add an Addendum Note. For help, click here.
- For the desired Patient Record, click the View button
 (or anywhere on the Patient Record row) or click the Edit button
  .
.
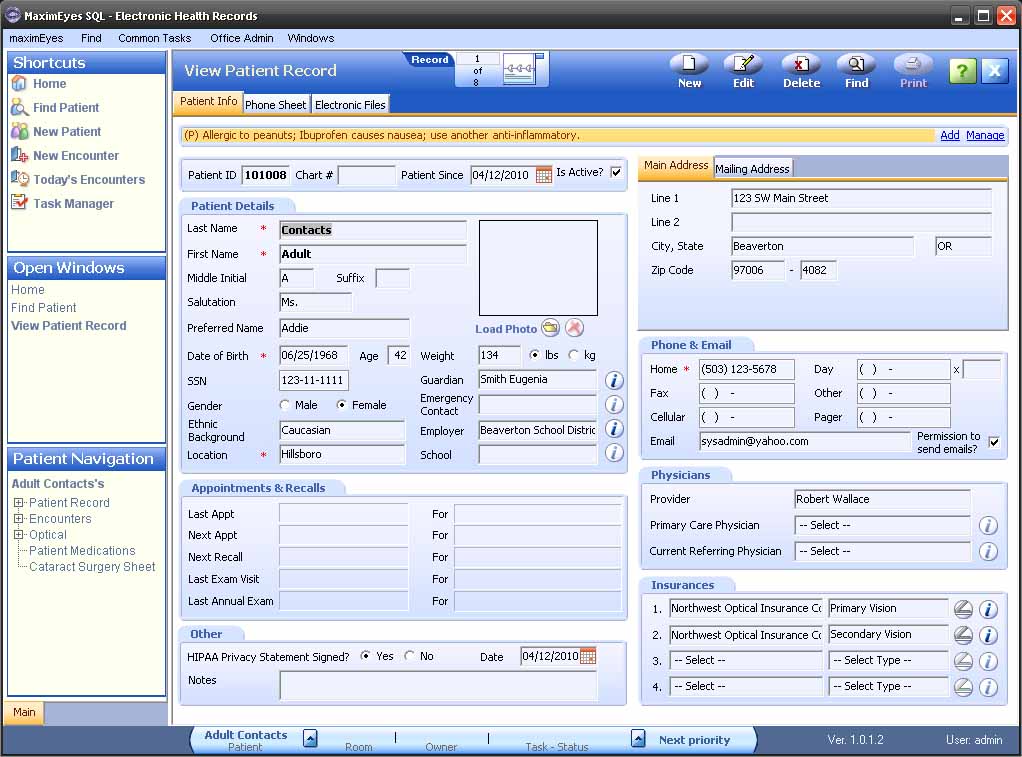
- The corresponding Patient Record window (View Patient Record or Edit Patient Record) displays in the Contents Pane.
- The Patient Navigation list displays the selected patient's name and a navigation tree for accessing the patient's Record, Encounters, Optical, Medications and Cataract Surgery Sheet.
Note: For those patients who have not had cataract surgery, a message to this effect displays when Cataracts Surgery Sheet is clicked.
- In the Patient Navigation list, click the Expand icon
 next to Encounters to expand the navigation tree.
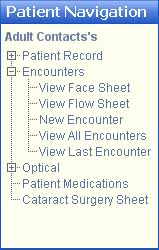
- Click View All Encounters.
Note: To view the most recent Patient Encounter, click View Last Encounter in the expanded navigation tree. For more information, click here.
- The Encounters window displays in the Contents Pane.
- The Patient Details icon
 is active.
- The Filter By tab displays below the patient name.
- The Patient Encounters tab displays below the Filter By tab, listing the Patient Encounters in ascending chronological order.
- The Open Windows list displays Encounters.
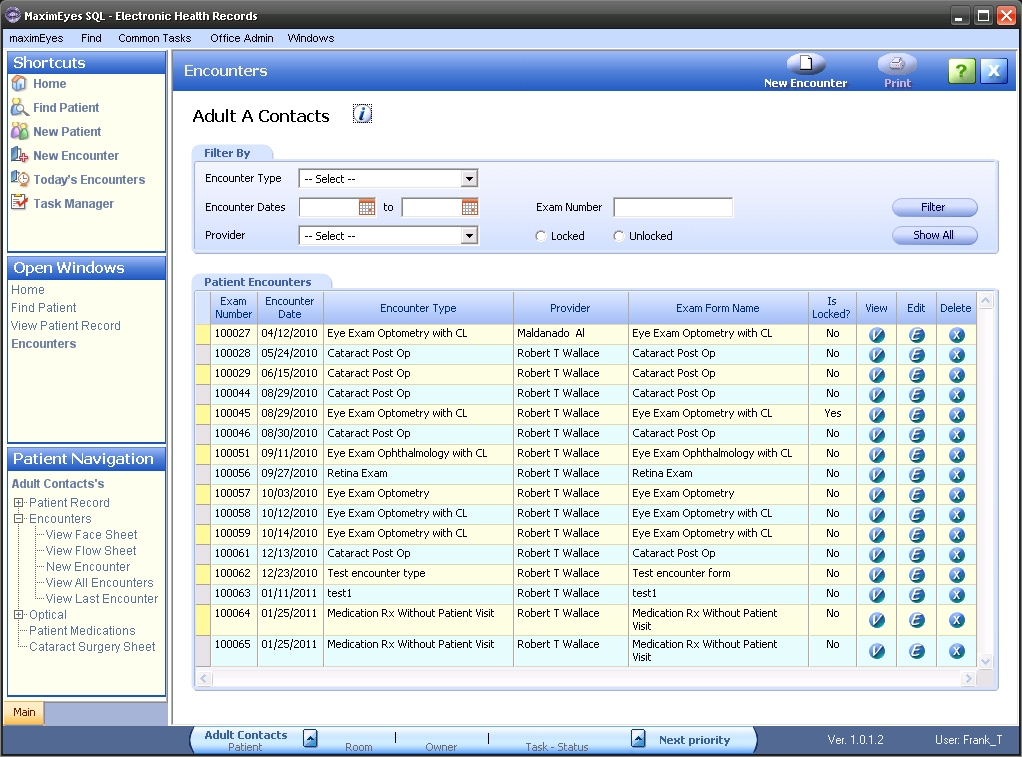
- For the Encounter to which you wish to add an Addendum Note, click the Edit button in its row.
- A warning displays, stating that the Encounter is locked.
- Click the Yes button to confirm you wish to add an Addendum Note for the Encounter.
- Click the No button to not add an Addendum Note and return to the Encounters window.
- The Contents pane updates to display the View Encounter window with the Patient Encounter Addendum displayed on top.
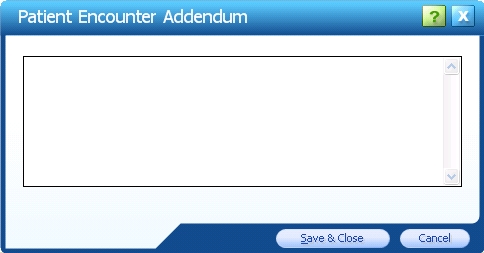
Enter Addendum Note text
- Enter the desired text.
- To close the Patient Encounter Addendum popup and save changes, click the Save & Close button.
The Locked Encounter icon in the Secondary toolbar updates to display a red exclamation point to the right of it, indicating that the Encounter is "locked and modified."
- To close the popup without saving changes, click the Cancel button.
- To close the Patient Encounter Addendum popup and save changes, click the Save & Close button.
- To view the Addendum Note, select the Addendum Element from the Final Findings page of the Encounter. For help on navigating to an Encounter page, click here.
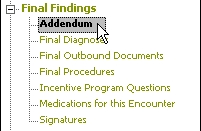
- If needed, scroll down the Final Findings page to view the Addendum Element.
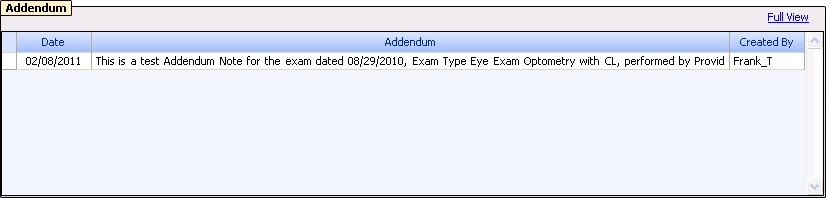
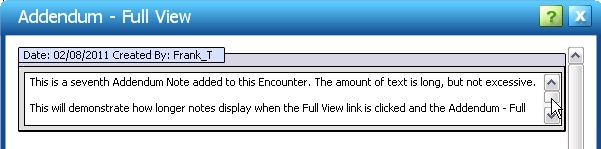
- To view the complete text of the Addendum Note, click the Full View link in the upper-right corner of the Element. The Addendum - Full View popup displays.
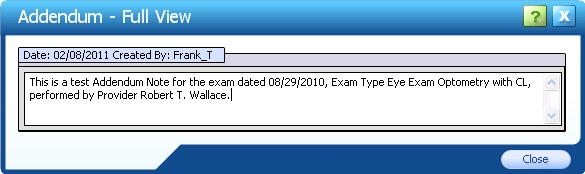
- To close the popup, click the Close button.
- As desired, add additional Addendum Notes to the Encounter by clicking the Locked Encounter icon in the Secondary toolbar and repeating Steps 1 - 5.
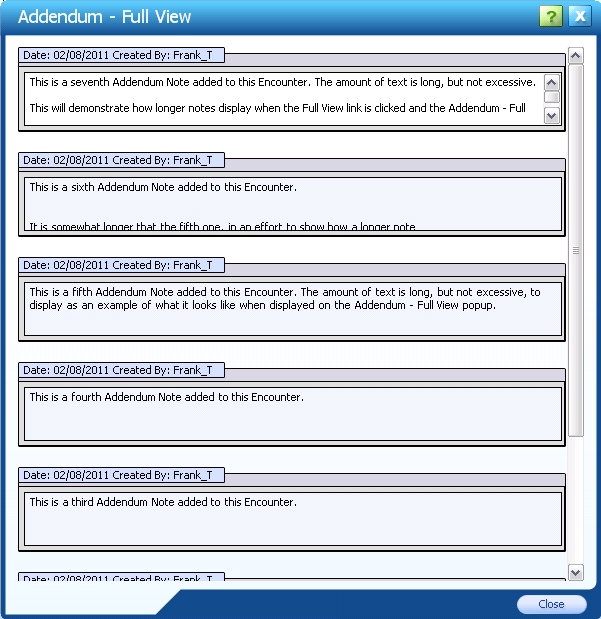
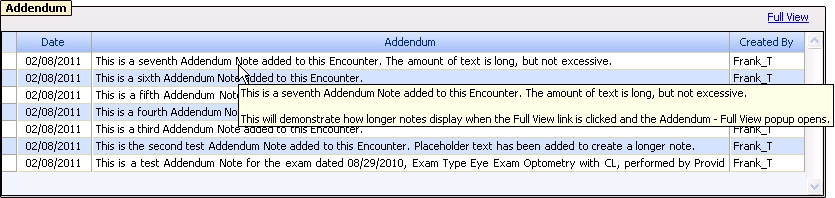
- Multiple Addendum Notes display in descending chronological order in the Addendum Element.
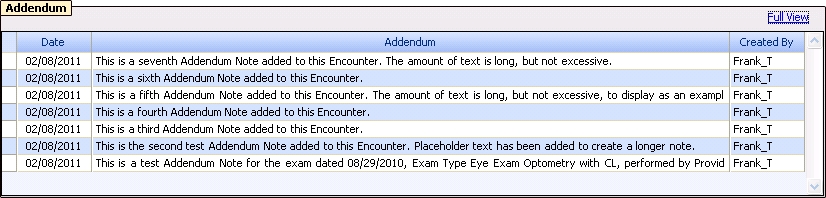
- To view the complete list of multiple Addendum Notes, click the Full View link in the upper-right corner of the Element. The Addendum - Full View popup displays.
- Addendum Notes display in descending chronological order.
- To close the popup, click the Close button.
View the complete text of an Addendum Note
From the Addendum Element, do one of the following:
- Click the Full View link in the upper-right corner.
- The Addendum - Full View popup displays.
- Addendum Notes display in descending chronological order.
- Use the scroll bar on the right side of the Note to display the text.
- To close the popup, click the Close button.
- Hover the cursor over the Addendum Note whose text you wish to display. The complete text displays.
 Top of Page