Add Document Template
Step-by-step
This popup window displays when a user associates a Document Template with any of the following:
- Final Outbound Documents Element:
- The added Document automatically displays in the Final Outbound Documents Element for all Patient Encounters that include this Element.
- Navigate to this Element by selecting from the Office Admin menu Encounter Admin
 Encounter Manager Setup Encounter Elements.
- Diagnoses Code:
- A Document Template can be associated with a Diagnoses Code when adding or editing the Diagnoses Code.
- The added Document automatically displays in the Final Outbound Documents Element in a Patient Encounter whenever the user selects that Diagnoses Code in the Final Diagnoses Element.
- Navigate to this module by selecting from the Office Admin menu Encounter Admin Diagnoses Codes.
- CPT Code:
- A Document Template can be associated with a CPT code when adding or editing the CPT code.
- The added Document automatically displays in the Final Outbound Documents Element in a Patient Encounter whenever the user selects that CPT code in the Final Procedures Element.
- Navigate to this module by selecting from the Office Admin menu Encounter Admin CPT Codes.
- Encounter Type:
- Multiple Document Templates can be associated with an Encounter Type when adding or editing the Encounter Type.
- The added Document(s) automatically display in the Final Outbound Documents Element when a Patient Encounter is created using the Encounter Type.
- Navigate to this module by selecting from the Office Admin menu Encounter Admin Encounter Manager Setup Encounter Types.
The functionality of the Associate Document Template window is the same for each, regardless of how it is invoked; only the title bar of the window changes to reflect to what the Document is being associated.
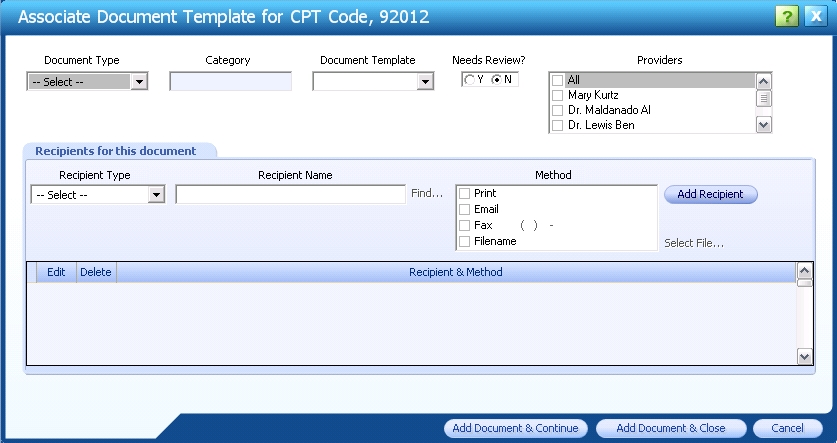
For example, when adding a Document Template to CPT Code 92012, the title bar of the Add Document Template window displays, Associate Document Template for CPT Code, 92012.
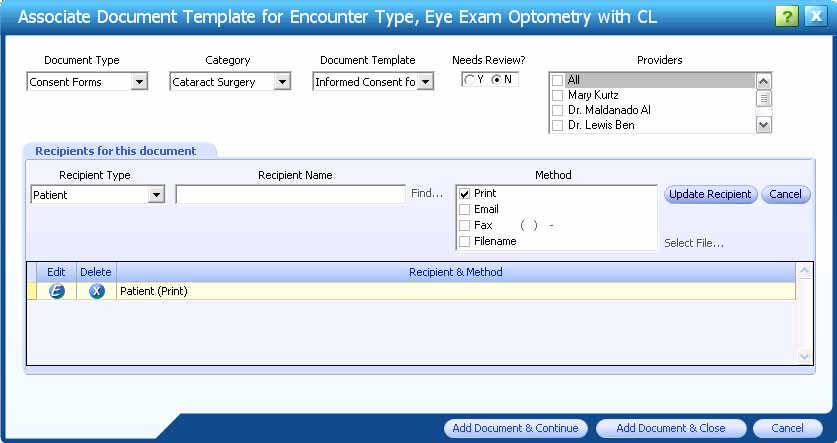
Example
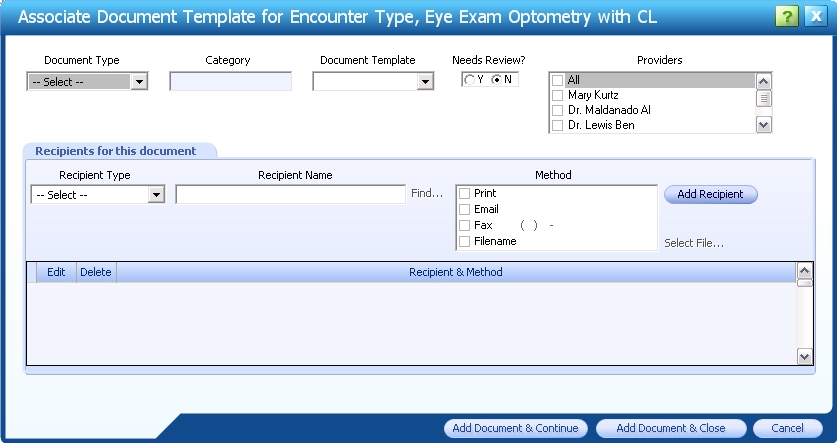
In the following example, a Document Template is associated with the Encounter Type, Eye Exam Optometry with CL.
- From the Office Admin menu, select Encounter Admin Encounter Manager Setup Encounter Types. The Encounter Types window displays.
- In the row for Encounter Type Eye Exam Optometry with CL, click the Edit button.
 The Edit Encounter Type window displays.
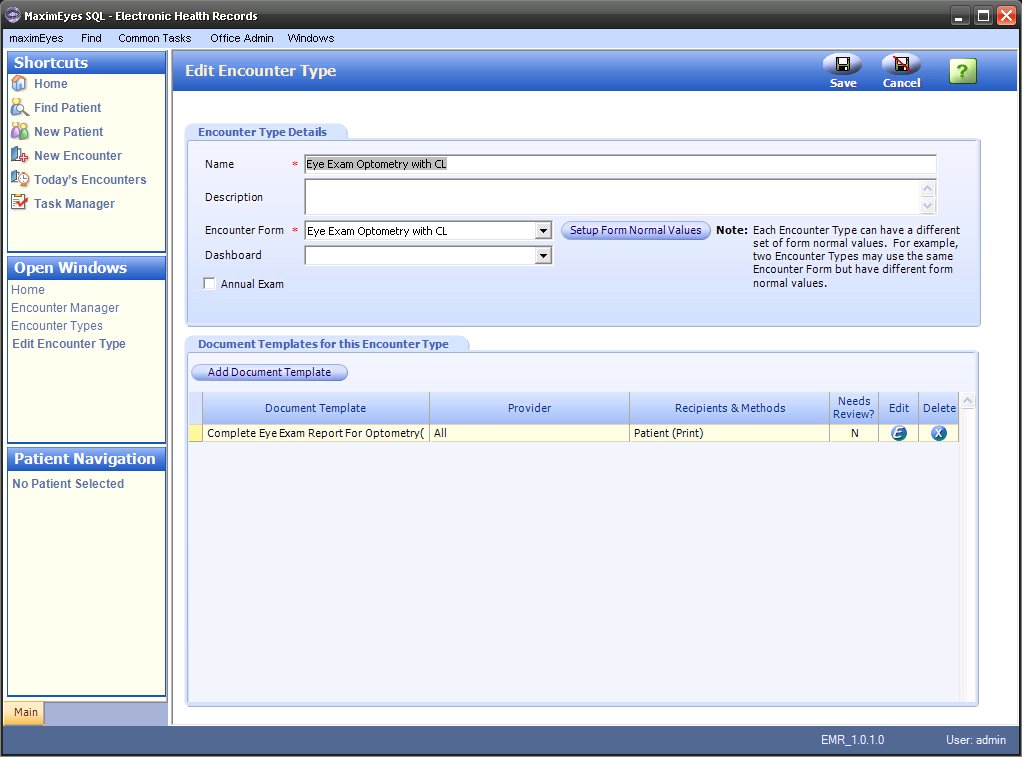
- In the Document Templates for this Encounter Type tab, click the Add Document Template button. The Associate Document Template for Encounter Type, Eye Exam Optometry with CL displays.
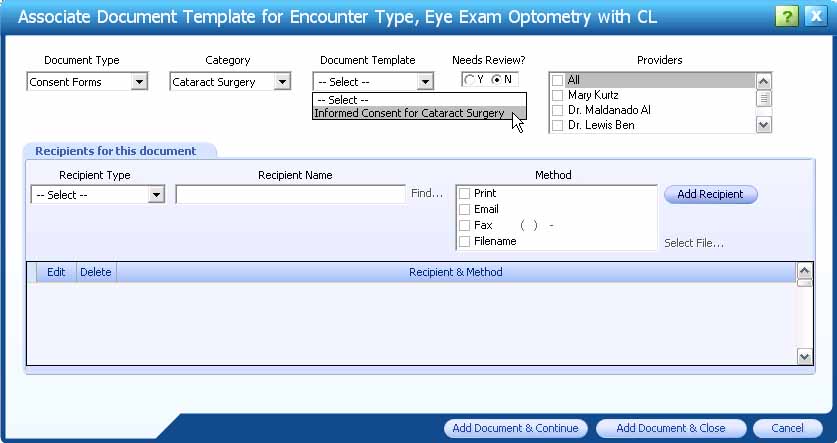
- Select values from the fields in the order presented (first Document Type, followed by Category, Document Template, Needs Review? and Providers).
- If you try to select from other than Document Type first, a warning icon
 flashes.
- As you select from each drop-down list, the list to its right automatically filters to the appropriate corresponding values.
For example, if you select Document Type Consent Forms, the Category drop-down list automatically filters to include only consent forms.
Then, after selecting Category Cataract Surgery, the Document Templates list automatically filters to include only a list of Document Templates associated with cataract surgery.
- If you try to select from other than Document Type first, a warning icon
- Select the Recipient Type in the Recipients for this document tab. The Cancel button displays to the right of the Add Recipient button.
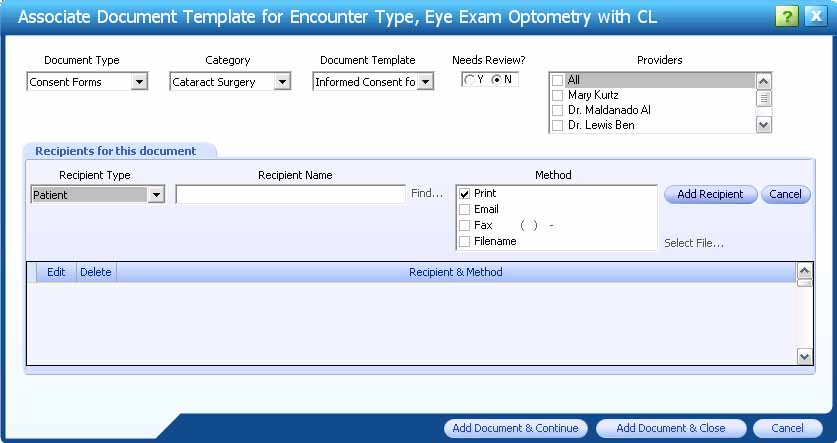
- The Method defaults to the corresponding method for the Recipient Type. For example:
- Recipient Type Patient defaults to the Print method.
- Recipient Type Referred By defaults to the Fax method.
- Select/de-select other Methods by clicking the check box
 to the left of the Method name.
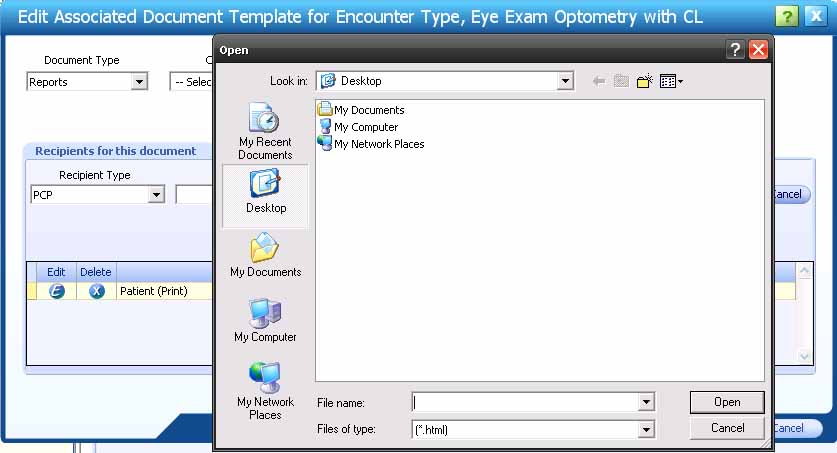
When Filename is selected as the Method, the Select File [Name] link is active. Click it to display the Open File dialog and browse for the desired file on the local computer.
- Click the Add Recipient button to add the Recipient.
Note: The system will not allow you to add duplicate Recipient Types.
- Click the Cancel button to not add the Recipient and clear the fields in the Recipients for this document tab.
Edit Recipient & Method
- Click the Edit button on the Recipient Name row. The Update Recipient and Cancel buttons display where the Add Recipient button displayed.
- Make changes as desired.
- Click the Update Recipient button to save the changes.
- Click the Cancel button to not update the Recipient and Method.
Delete Recipient & Method
When a Recipient and Method are deleted, the link between the Recipient and Document is removed.
Click the Delete button  on the Recipient Name row. A warning displays.
- Click the Yes button to remove the link between the Recipient and Document.
- Click the No button to cancel the deletion.
When finished adding recipients to the Document Template
All Recipients must be added to the Document Template before the Document Template can be added to the Encounter Type.
Save the added Document and add another Document
- The Associate Document Template for Encounter Type [Name] popup displays.
- The fields are reset.
- The cursor is in the Document Type drop-down list.
Click the Add Document & Continue button.
Add a Document and close the Associate Document Template for Encounter Type [Name] popup
- The Associate Document Template for Encounter Type [Name] popup closes.
- The Edit Encounter Type window displays.
Click the Add Document & Close button.
Close the popup without saving changes
- A warning displays, asking you to confirm closing without saving changes. Click the Yes button to confirm.
- The Associate Document Template for Encounter Type [Name] popup closes.
- The Edit Encounter Type window displays.
Click the Cancel button.
 Top of Page
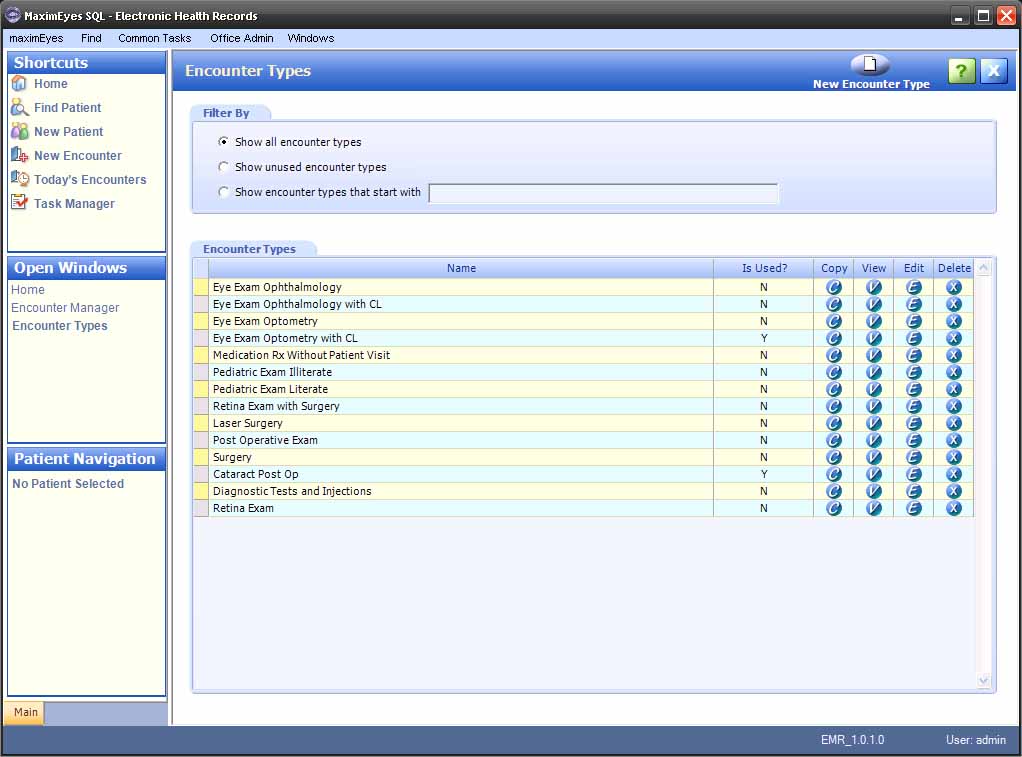